Steno3D MATLAB Client
Welcome to the MATLAB client library for Steno3D by ARANZ Geo Limited. Explore and collaborate on your 3D data!
Demo Video
Quickstart
Warning
This library is in PRE-RELEASE. Please submit any issues or feedback on github. There will very likely be backwards-incompatible changes as development continues. You can follow along with new releases on the github release page.
If you have not yet installed Steno3D for MATLAB, you can download the zip file then in MATLAB:
cd Downloads/;
unzip('steno3dmat.zip');
cd steno3dmat;
installSteno3D;
Note
Steno3D requires MATLAB version R2014b or later.
You also need to sign up for a Steno3D account. From there, you can request a developer API key.
At that point, login and start uploading your MATLAB figures
steno3d.login;
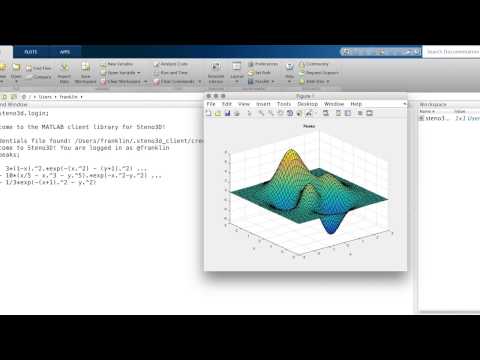
peaks;
proj = steno3d.convert(gcf);
proj.upload;
Function and API documentation is available from within MATLAB
help steno3d;
or online.
If you run into problems or if you see a new release on github, you can upgrade in MATLAB:
upgradeSteno3D;
If your problems persist, please submit an issue.
The latest version of Steno3D is 1.0.1. Detailed release notes are available on github.
Contents
Steno3D MATLAB Package
The Steno3D MATLAB package contains tools to build Steno3D resources through plotting functions or at the command line, convert existing MATLAB figures to Steno3D resources, and upload these resources to steno3d.com.
Plotting Functions: a MATLAB-esque way to create Steno3D projects
steno3d.scatter()- Create and plot a Steno3D Point resource
steno3d.line()- Create and plot a Steno3D Line resource
steno3d.surface()- Create and plot a gridded Steno3D Surface resource
steno3d.trisurf()- Create and plot a triangulated Steno3D Surface resource
steno3d.volume()- Create and plot a Steno3D Volume resource
Helper Functions: simple functions to manipulate Steno3D projects
steno3d.addData()- Add a dataset to an existing Steno3d resource
steno3d.addImage()- Add a PNG image to an existing Steno3d resource
steno3d.combine()- Combine a list of Steno3D Projects into one Project
steno3d.convert()- Convert MATLAB figure or axes into a Steno3D Project
Communicate with steno3d.com:
steno3d.login()- Log in to steno3d.com to allow Steno3D Project uploads
steno3d.upload()- Upload a figure, axes, or Steno3D Project to steno3d.com
steno3d.logout()- Log out of current session on steno3d.com
Additional Packages:
Note
Steno3D requires MATLAB R2014b or greater and the props package that comes bundled in the steno3dmat distribution.
scatter
-
steno3d.scatter(...)
Create and plot a Steno3D Point resource
steno3d.scatter(XYZ) creates a Steno3D Project with a Point resource
defined by n x 3 matrix XYZ.
steno3d.scatter(X, Y, Z) creates a Steno3D Project with a Point
resource defined by equal-sized vectors or matrices X, Y, and Z.
steno3d.scatter(..., color) creates a Point resource of the give color,
where color is a 1x3 RGB color, hex color string, named color string,
or ‘random’.
steno3d.scatter(..., title1, data1, ..., titleN, dataN) adds any number
of titled datasets to the Point resource. title must be a string and
data must be an matrix or vector that, when flattened, is length n,
where n is the number of points. (For more details see steno3d.addData())
steno3d.scatter(project, ...) adds the Point resource to project, an
existing Steno3D Project. project may also be a figure or axes handle
that was created by a Steno3D plotting function
project = steno3d.scatter(...) returns project, the Steno3D Project
that contains the new Point resource.
[project, points] = steno3d.scatter(...) returns project, the Steno3D
Project, and points, the new Point resource.
steno3d.scatter is more similar to the MATLAB builtin function scatter3
than the builtin function scatter since it requres a 3D dataset.
Unlike the builtin functions, steno3d.scatter does not support any
additional property/value pairs. After creating a Point resource with
steno3d.scatter, properties for the Point object can be directly
modified.
Example:
x = 0:pi/10:4*pi;
[myProject, myPoints] = steno3d.scatter(                        ...
    [x(:) cos(x(:)+0.2) sin(x(:))], [0 .5 .5],                  ...
    'Random Data', rand(size(x))                                ...
);
myPoints.Title = 'Example Points';
myPoints.Description = 'Trig functions with random data';
myProject.Title = 'Project with one set of Points';
myProject.Public = true;
steno3d.upload(myProject);
See more EXAMPLES
See also steno3d.core.Point, steno3d.upload, steno3d.addData, steno3d.addImage, steno3d.core.Project
line
-
steno3d.line(...)
Create and plot a Steno3D Line resource
steno3d.line(X, Y, Z) creates a Steno3D Project with a Line resource
defined by vectors X, Y, and Z. If X, Y, and Z are matrices of the same
size, only one Line resource is created but separate columns are
disconnected.
steno3d.line(segments, vertices) creates a Steno3D Project with a Line
resource defined by segments, n x 2 matrix of vertex indices, and
vertices, m x 3 matrix of spatial coordinates.
steno3d.line(..., color) creates a Line resource of the given color,
where color is a 1x3 RGB color, hex color string, named color string,
or ‘random’.
steno3d.line(..., title1, data1, ..., titleN, dataN) adds any number of
titled datasets to the Line resource. title must be a string and data
must be an n x 1 or an m x 1 vector, where n is the number of segments
and m is the number of vertices. If m == n, the data location will
default to segments. Data may also be added with steno3d.addData().
steno3d.line(project, ...) adds the Line resource to project, an
existing Steno3D Project. project may also be a figure or axes handle
that was created by a Steno3D plotting function.
project = steno3d.line(...) returns project, the Steno3D Project that
contains the new Line resource.
[project, line] = steno3d.line(...) returns project, the Steno3D
Project, and line, the new Line resource.
Unlike the MATLAB builtin line function, steno3d.line requires 3D data
and does not support any additional property/value pairs. After
creating a Line resource with steno3d.line, properties of the Line
object can be directly modified.
Example:
x = 0:pi/10:4*pi;
[proj, lin] = steno3d.line(                                     ...
    x, cos(x), sin(x), 'k', 'Cosine Vert Data', cos(x)          ...
);
lin.Title = 'Example Line';
lin.Description = 'Trig functions with random data';
proj.Title = 'Project with one Line';
proj.upload()
See more EXAMPLES
See also steno3d.core.Line, steno3d.upload, steno3d.addData, steno3d.core.Project
surface
-
steno3d.surface(...)
Create and plot a gridded Steno3D Surface resource
steno3d.surface(Z) creates a Steno3D Project with a Surface grid
resource. Heights are defined by Z, an m x n matrix. Values are plotted
with unit spacing, where x and y values equal 0:m-1 and 0:n-1,
respectively.
steno3d.surface(origin, Z) creates a Steno3D Project with a Surface
resource. origin is a 1 x 3 vector offset; x and y values correspond to
origin(1) + (0:m-1) and origin(2) + (0:n-1), and heights equal to
Z + origin(3).
steno3d.surface(X, Y) creates a Steno3D Project with a flat grid
Surface in the horizontal plane with x and y node values corresponding
to vectors X and Y, respectively.
steno3d.surface(dir1, h1, dir2, h2, origin) creates a Steno3D Project
with a flat grid Surface in an arbitrary plane. The plane is defined by
1 x 3 axes vectors, dir1 and dir2, node locations along those axes, h1
and h2, and a 1 x 3 origin vector. dir1 and dir2 may also be ‘X’, ‘Y’,
or ‘Z’ in addition to 1 x 3 axes. For example, the following all
produce the same result:
steno3d.surface(0:10, 0:20)
steno3d.surface([1 0 0], 0:10, [0 1 0], 0:20, [0 0 0])
steno3d.surface('X', 0:10, 'Y', 0:20, [0 0 0])
steno3d.surface(..., Z) creates a Steno3D Project and Surface grid with
node heights Z, an n x m matrix, where m is the length of X or h1 and
n is the length of Y or h2. Z may also be a length m*n vector.
steno3d.surface(..., color) creates a Surface resource of the given
color, where color is a 1x3 RGB color, hex color string, named color
string, or ‘random’.
steno3d.surface(..., title1, data1, ..., titleN, dataN) adds any number
of titled datasets to the Surface resource. title must be a string and
data must be a matrix of size m x n or m*n x 1 for node data or a
matrix of size (m-1) x (n-1) or (m-1)*(n-1) x 1 for face data, where n
is the length(X), length(h1), or size(Z, 1) and m is the length(Y),
length(h2), or size(Z, 2). (For more details see steno3d.addData())
steno3d.surface(..., title1, png1, ..., titleN, pngN) adds any number
of titled images to the Surface resource. title must be a string and
png must be a png file. The image will be stretched to span the
entire grid surface. Any number of datasets and textures may be applied
to an individual Surface. (For more details see steno3d.addImage())
steno3d.surface(project, ...) adds the Surface resource to project, an
existing Steno3D Project. project may also be a figure or axes handle
that was created by a Steno3D plotting function.
project = steno3d.surface(...) returns project, the Steno3D Project
that contains the new Surface resource.
[project, surface] = steno3d.surface(...) returns project, the Steno3D
Project, and surface, the new Surface resource.
An important difference between steno3d.surface the MATLAB builtin
surface function is data ordering. This function uses ordering produced
by the function ndgrid, where size(Z) == [length(x) length(y)].
The builtin surface function uses ordering produced by the function
meshgrid, where size(Z) = [length(y) length(x)]. Also,
steno3d.surface does not support additional property/value pairs; after
creating the Surface, its properties may be directly modified.
Example:
pngFile = [tempname '.png'];
imwrite(imread('ngc6543a.jpg'), pngFile, 'png');
[myProject, mySurface] = steno3d.surface(                       ...
    'X', 0:20, 'Z', 0:25, [0 0 -25], rand(21, 26), 'k',         ...
    'Increasing Numbers', 1:20*25, 'Space Image', pngFile       ...
);
mySurface.Title = 'Space Image';
mySurface.Description = ['Vertical surface with some random '   ...
                         'bumps and a space image'];
myProject.Title = 'Project with one Surface';
myProject.Pulbic = true;
steno3d.upload(myProject);
See more EXAMPLES
See also steno3d.core.Surface, steno3d.upload, steno3d.addData, steno3d.addImage, steno3d.core.Project
trisurf
-
steno3d.trisurf(...)
Create and plot a triangulated Steno3D Surface resource
steno3d.trisurf(triangles, X, Y, Z) creates a Steno3D Project with a
Surface resource of triangulated faces. The surface is defined by
triangles, n x 3 matrix of vertex indices, and X, Y, and Z, equal-sized
vectors of vertex coordinates.
steno3d.trisurf(triangles, vertices) creates a Steno3D Project with a
Surface resource defined by triangles, n x 3 matrix of vertex indices,
and vertices, m x 3 matrix of spatial coordinates.
steno3d.trisurf(..., color) creates a Surface resource of the given
color, where color is a 1x3 RGB color, hex color string, named color
string, or ‘random’.
steno3d.trisurf(..., title1, data1, ..., titleN, dataN) adds any number
of titled datasets to the Surface resource. title must be a string and
data must be an n x 1 or an m x 1 vector, where n is the number of
triangles and m is the number of vertices. If m == n, the data location
will default to triangles (to override this see steno3d.addData()).
steno3d.trisurf(project, ...) adds the Surface resource to project, an
existing Steno3D Project. project may also be a figure or axes handle
that was created by a Steno3D plotting function.
project = steno3d.trisurf(...) returns project, the Steno3D Project that
contains the new Surface resource.
[project, SURFACE] = steno3d.trisurf(...) returns project, the Steno3D
Project, and SURFACE, the new Surface resource.
steno3d.trisurf is useful in conjunction with MATLAB triangulation
functions like convhull. Unlike the MATLAB builtin trisurf,
steno3d.trisurf does not currently support triangulation objects, nor
does it support any additional property/value pairs. After creating a
Surface resource with steno3d.trisurf, properties of the Surface object
can be directly modified.
Example:
x = [0 1 0 0]; y = [0 0 1 0]; z = [0 0 0 1];
tris = convhull(x, y, z);
[myProject, mySurface] = steno3d.trisurf(                       ...
    tris, x, y, z, 'r', 'Face Data', rand(4, 1)                 ...
);
mySurface.Title = 'Triangulated Surface';
mySurface.Description = 'Convex hull triangles';
myProject.Title = 'Project with one Surface';
myProject.Public = true;
steno3d.upload(myProject);
See more EXAMPLES
See also steno3d.core.Surface, steno3d.upload, steno3d.addData, steno3d.addImage, steno3d.core.Project
volume
-
steno3d.volume(...)
Create and plot a Steno3D Volume resource
steno3d.volume(data) creates a Steno3D Project with a Volume resource
defined by data, an m x n x p matrix. The data values are plotted on
cell-centers with unit widths. Cell boundaries are defined by x = 0:m,
y = 0:n, and z = 0:p.
steno3d.volume(origin, data) creates a Steno3D Project with a Volume
resource as above, offset by 1 x 3 origin vector. Cell boundaries are
defined by x = origin(1) + (0:m), y = origin(2) + (0:n), and
z = origin(3) + (0:p).
steno3d.volume(X, Y, Z, data) creates a Steno3D Project with a Volume
resource as above. X, Y, and Z are vectors of cell boundaries (with
sizes n x 1, m x 1, and p x 1, respectively) OR of cell widths (with
sizes (n-1) x 1, (m-1) x 1, and (p-1) x 1, respectively). Since the
volume dimensions are given by X, Y, and Z in this case, data may also
be a m*n*p x 1 vector.
steno3d.volume(X, Y, Z, origin, data) creates a Steno3D Project with a
Volume resource as above, offset by 1 x 3 origin vector. This is
useful when X, Y, and Z are cell widths.
steno3d.volume(..., title1, data1, ..., titleN, dataN) adds any number
of titled datasets to the Volume resource. title must be a string and
data must be a matrix of size m x n x p (or m*n*p x 1 if X, Y, and Z
are provided). title/data pairs may replace the standalone data
matrices above. (For more details see steno3d.addData())
steno3d.volume(project, ...) adds the Volume resource to project, an
existing Steno3D Project. project may also be a figure or axes handle
that was created by a Steno3D plotting function.
project = steno3d.volume(...) returns project, the Steno3D Project that
contains the new Volume resource.
[project, volume] = steno3d.volume(...) returns project, the Steno3D
Project, and volume, the new Volume resource.
steno3d.volume does not have a MATLAB builtin counterpart. When
plotting a Steno3D Volume locally, its boundaries are displayed in a
similar way as slice, but when uploaded to steno3d.com, the entire
volume is available for plotting, slicing, and isosurfacing. After
creating a Volume resource with steno3d.volume, properties of the
Volume object can be directly modified.
Example:
[xvals, yvals, zvals] = ndgrid(-7.5:4:7.5, -9:2:9, -9.5:9.5);
[proj, vol] = steno3d.volume(                                   ...
    4*ones(5, 1), 2*ones(10, 1), ones(20, 1), [-10 -10 -10],    ...
    'X-Values', xvals, 'Y-Values', yvals, 'Z-Values', zvals     ...
);
vol.Title = 'Example Volume';
vol.Description = 'Volume with x, y, and z data';
vol.Title = 'Project with one Volume';
proj.Public = true;
steno3d.upload(proj);
See more EXAMPLES
See also steno3d.core.Volume, steno3d.upload, steno3d.addData, steno3d.core.Project
addData
-
steno3d.addData(...)
Add a dataset to an existing Steno3d resource
steno3d.addData(resource, data) adds matrix or vector data to the
Steno3D resource (Point, Line, Surface, or Volume). This function first
attempts to assign data to cell centers then to nodes. If the length of
the data does not match either of these, this function errors.
steno3d.addData(resource, title, data) adds data to the resource with a
given title string.
Example:
x = [0 1 0 0]; y = [0 0 1 0]; z = [0 0 0 1];
tris = convhull(x, y, z);
[proj, sfc] = steno3d.trisurf(tris, x, y, z, 'r');
steno3d.addData(sfc, 'Cell Center Data', rand(4, 1));
Note
If the number of cell centers matches the number of nodes (as is the case in the example above), this function will default to locating data on cell centers. However, this can be changed programatically:
mySurface.Data{end}.Location = 'N';
and change the title accordingly:
mySurface.Data{end}.Data.Title = 'Node Data';
See more EXAMPLES
See also steno3d.core.DataArray, steno3d.addImage, steno3d.trisurf
addImage
-
steno3d.addImage(...)
Add a PNG image to an existing Steno3d resource
steno3d.addImage(resource, pngfile, width, height) scales PNG image
pngfile to size width x height, then projects it in a direction
perpendicular to the horizontal plane onto the Steno3D resource
(Point or Surface).
steno3d.addImage(resource, pngfile, dir1, dim1, dir2, dim2) scales and
reshapes the PNG image pngfile so its x-axis lies along dir1 with
length dim1 and its y-axis lies along dir2 with length dim2. dir1 and
dir2 are either a 1 x 3 vector or ‘X’, ‘Y’ or ‘Z’. The image is then
projected in a direction perpendicular to dir1 and dir2 (the
dir1-cross-dir2 direction) onto the Steno3D resource.
steno3d.addImage(..., origin) shifts the origin of the image by 1 x 3
vector origin, prior to projection onto the resource.
steno3d.addImage(..., title) gives the image a title string. If no
title is provided, the image will be titled based on the PNG file name.
Images can only be added to Points or Surfaces. Also, the images are
simply projected straight onto the Resource. This is different than
MATLAB’s ‘texturemap’ face coloring that wraps the image based on the
underlying surface geometry. To map data to the geometry, use
steno3d.addData() instead.
Also, when plotting projects locally, images only show up as dashed outlines at the position they are projected from. To see the result of adding the image, you must upload the project and view it on steno3d.com.
Example:
% Generate a png image
[x, y, z] = sphere; surf(x, y, z); h = findobj('Type', 'surface');
load earth; hemisphere = [ones(257,125), X, ones(257,125)];
set(h, 'CData', flipud(hemisphere), 'FaceColor', 'texturemap');
colormap(map); axis equal; view([90 0]);
fig = gcf; fig.Position = [fig.Position(1:3) fig.Position(3)];
ax = gca; ax.Position = [0 0 1 1];
pngFile = [tempname '.png'];
print(fig, '-dpng', tempFile);
% Create a surface
verts = [x(:) y(:) z(:)];
tris = convhull(x(:), y(:), z(:));
[proj, sfc] = steno3d.trisurf(tris, verts);
% Add the image
steno3d.addImage(sfc, pngFile, 'X', 2, 'Z', 2, [-1 -1 -1],      ...
                 'Hemisphere');
See more EXAMPLES
See also steno3d.core.Texture2DImage, steno3d.addData, steno3d.trisurf
combine
-
steno3d.combine(...)
Combine a list of Steno3D Projects into one Project
project = steno3d.combine(projects) takes projects, a list of Steno3D
Projects, and combines their resources into one project
project = steno3d.combine(project1, project2, ..., projectN) combines
all the input projects into one project.
Example:
peaks; peaksProj = steno3d.convert(gcf);
sphere; sphereProj = steno3d.convert(gcf);
comboProj = steno3d.combine(peaksProj, sphereProj);
comboProj.Title = 'Two-Surface Project';
See more EXAMPLES
See also steno3d.core.Project, steno3d.convert
convert
-
steno3d.convert(...)
Convert MATLAB figure or axes into a Steno3D Project
project = steno3d.convert(handle) converts the figure or axes HANDLE
to PROJECT, a Steno3D Project or list of Projects.
project = steno3d.convert(..., parameter, value) converts the figure or
axes handle using the given parameter/value pairs. Available parameters
are:
- CombineAxes: true or false (default: true)
- If HANDLE is a figure with multiple axes and CombineAxes is false, a separate project will be created for each axes. If HANDLE is a figure with multiple axes and CombineAxes is true, the contents of all axes will be added to one project. If HANDLE is an axes or a figure with one axes, CombineAxes has no effect.
- CombineResources: true or false (default: true)
- If CombineResources is false, every MATLAB graphics object encountered will produce a separate Steno3D Resource. If CombineResources is true, this function attempts to combine similar graphics objects into single Steno3D Resources. This includes combining multiple data sets with identical underlying geometry and appending similar resources with the same data titles (or no data). Although this parameter exists, it is recommended to build resources carefully using the Steno3D plotting rather than relying on correct conversion of MATLAB graphics.
Supported MATLAB graphics types include contour, group, image, line, patch, scatter, and surface. These cover the majority of MATLAB builtin plotting functions. Currently, unsupported MATLAB graphics types include polaraxes, transform, area, bar, errorbar, quiver, stair, stem, rectangle, text, light, and function objects.
Additionally, not all properties of the graphics are supported by Steno3D. Most notably, variable color data is not supported; only one-element data is currently allowed. Other unsupported aspects are different line/marker types, variable alpha data, camera/lighting, etc. After converting a MATLAB figure to a Steno3D Project, you may plot the project to ensure all the required features were converted.
If you would like to see additional support please submit an issue on github or consider contributing.
Example:
peaks;
peaksProj = steno3d.convert(gcf);
See more EXAMPLES
See also steno3d.core.Project, steno3d.combine
login
-
steno3d.login(...)
Log in to steno3d.com to allow Steno3D Project uploads
steno3d.login() logs in to steno3d.com with the most recently saved API
key and adds steno3d to your MATLAB path if it is not already added.
steno3d.login(apikey) logs in to steno3d.com with API key apikey
requested by a Steno3D account holder from their profile. APIKEY may
also be a username if the API key associated with that username is
saved.
steno3d.login(..., parameter, value) logs in using the given
parameter/value pairs. Avaliable parameters are:
- CredentialsFile: string (default: ‘~/.steno3d_client/credentials’)
- Path to file with saved API key. If a new API key is provided and the file does not yet exist, it will be created. Unless the default path is used, this will have to be provided on every login.
- SkipCredentials: true or false (default: false)
- If true, the API key will not be read from the CredentialsFile nor will it be saved. If false, the API key will be read from the CredentialsFile, and if a new API key is provided, it will be saved. Note: Even if SkipCredentials is true, the API key will be available in the current workspace and will persist in the MATLAB history. If you feel like your API key has become compromised you may delete it throuh your online profile.
Logging in to steno3d is required to upload projects to steno3d.com. To obtain an API developer key, you need a Steno3D account:
Then, you can request a devel key:
https://steno3d.com/settings/developer
Unless you choose to ‘SkipCredentials’, your API key will be saved
locally and read next time you call steno3d.login(). On login, Steno3D
also checks that its version is up to date. If it is not, the user will
be prompted to upgrade; an out of date version may or may not prevent a
successful login.
Example:
steno3d.login('username//12345678-xxxx-yyyy-zzzz-SOMEDEVELKEY', ...
              'CredentialsFile', '~/Dropbox/steno3d_cred')
peaks; steno3d.upload(gcf);
See more EXAMPLES
See also steno3d.logout, steno3d.upload, upgradeSteno3D
upload
-
steno3d.upload(...)
Upload a figure, axes, or Steno3D Project to steno3d.com
steno3d.upload(handle) uploads Steno3D Project handle to steno3d.com.
If handle is a figure or axes created by a Steno3D plotting function,
the corresponding Project is uploaded. (Note: The the current state of
the Project will be uploaded, including modifications that may not yet
be reflected in the figure. You may wish to call plot() on the project
prior to uploading to ensure all modifications are correct.) If handle
is a figure or axes handle unassociated with a Steno3D Project, the
figure or axes is converted to Steno3D using steno3d.convert() then
uploaded.
steno3d.upload(handle, privacy) sets the privacy of the Steno3D
Project on steno3d.com, where privacy is ‘public’ or ‘private’. If
privacy is not specified, the Public boolean property of the Project
handle is used. If that is not available, the default is ‘private’.
url = steno3d.upload(...) returns the url of the uploaded project. url
may also be a cell array of urls if multiple projects are uploaded
(for example, if a figure with multiple axes is converted to multiple
projects).
The privacy setting determines the project’s visibility online. If it is set to ‘private’, only you, the owner, can view it initially. View, Edit, and Manage permissions can be granted through the web interface. However, the number of private projects is limited on certain plans. If the privacy is ‘public’, anyone can view the project on the public explore page. More information about plans is available online.
Example:
steno3d.login();
peaks; proj = steno3d.convert(gcf);
url = steno3d.upload(proj, 'private');
steno3d.logout();
See more EXAMPLES
See also steno3d.convert, steno3d.core.Project, steno3d.login, steno3d.logout
logout
-
steno3d.logout(...)
Log out of current session on steno3d.com
steno3d.logout() logs user out of their current session with
steno3d.com, deletes current user data from the workspace, and removes
steno3d from the path if it is not on the default path by default.
Note: Although user data is deleted, the API key may remain in MATLAB
history. If you feel like your API key has become compromised you may
delete it through your online profile.
Example:
steno3d.login();
peaks; steno3d.upload(gcf);
steno3d.logout();
See more EXAMPLES
See also steno3d.login, steno3d.upload, upgradeSteno3D, uninstallSteno3D
version
-
steno3d.version(...)
Current local version of steno3dmat
ver = version() returns local version
Examples
Steno3D Example Scripts
Logging-In and Uploading to steno3d.com
upload - Steno3D upload examples
High-Level Plotting Functions
Additional Functional Utilities
Low-Level Core Resource Construction
project - Steno3D Project examples
point - Steno3D Point resource construction examples
line - Steno3D Line resource construction examples
surface - Steno3D Surface resource construction examples
volume - Steno3D Volume resource construction examples
data - Steno3D DataArray construction examples
texture - Steno3D Texture2DImage construction examples
upload examples
Example 1: Log in, implictly convert a figure, and upload as private
% Before uploading to steno3d.com you must login. With no
% parameters, login looks for a saved API key at the default
% location, ~/.steno3d_client/credentials, and prompts the user
% for one if none is found.
steno3d.login();
figure; peaks;
% Upload the figure to steno3d.com. This will convert the figure
% (or axes) to a Project using steno3d.convert. By default, the
% uploaded Project will be private.
steno3d.upload(gcf);
close;
% When complete, you may log out of your MATLAB session.
steno3d.logout();
Example 2: Log in without saving credentials, upload a Project
% Log in to steno3d.com. You can provide an API key at the
% command line. The SkipCredentials keyword prevents steno3d
% from saving the key to a file.
% Note: The key will exist in the MATLAB workspace and persist
% in the history.
steno3d.login(                                               ...
    'username//12345678-xxxx-yyyy-zzzz-SOMEDEVELKEY',        ...
    'SkipCredentials', true                                  ...
);
example2 = steno3d.scatter(rand(100, 3));
% Upload the Project as a public project. This project will be
% visible to everyone online.
steno3d.upload(example2, 'public');
steno3d.logout();
Example 3: Log in with saved credentials, use Project upload function
% Log in to steno3d.com. An alternative file to save credentials
% to may be specified with 'CredentialsFile'
steno3d.login('CredentialsFile', '~/Documents/steno3d_cred');
example3 = steno3d.scatter(rand(100, 3));
% Use the Project's upload function; privacy is set according to
% the Private property of the Project.
example3.upload();
steno3d.logout();
See also steno3d.upload, steno3d.login, steno3d.logout, steno3d.core.Project, steno3d.scatter
scatter plotting examples
Example 1: Create Steno3D Project with Point resource from x, y, and z
x = 0:pi/10:4*pi;
example1 = steno3d.scatter(x(:), cos(x(:)+0.2), sin(x(:)));
Example 2: Create Project with red Point resource from n x 3 matrix
x = 0:pi/10:4*pi;
example2 = steno3d.scatter([x(:) cos(x(:)+0.2) sin(x(:))], 'r');
Example 3: Create Project with Point resource with 2 datasets
x = 0:pi/10:4*pi;
example3 = steno3d.scatter(                                  ...
    x(:), cos(x(:)+0.2), sin(x(:)),                          ...
    'Cosine Data', cos(x(:)), 'Sine Data', sin(x(:))         ...
);
steno3d.scatter(                                             ...
    example3, [x(:)+5*pi cos(x(:)+0.2) sin(x(:))],           ...
    'Arctangent Data', atan(x(:))                            ...
);
Example 4: Return handle to Project and Point resource for editing
x = 0:pi/10:4*pi;
[example4, myPoints] = steno3d.scatter(x(:), cos(x(:)+0.2),  ...
                                       sin(x(:)), 'turquoise');
example4.Title = 'Example 4 Project';
myPoints.Title = 'Turquoise Scatter';
myPoints.Opts.Opacity = .75;
example4.plot();
clear myPoints x
You can run the above examples with:
steno3d.examples.scatter
Then plot the projects with:
example1.plot(); % etc...
See also steno3d.scatter, steno3d.core.Point, steno3d.core.Project
line plotting examples
Example 1: Plot a Steno3D Project with a Line from array input
x = 0:pi/10:4*pi;
example1 = steno3d.line(x, cos(x+0.2), sin(x));
clear x;
Example 2: Plot Project with red Line from segments and vertices
x = (0:pi/10:4*pi)';
verts = [x cos(x+0.2) sin(x); x zeros(length(x), 2)];
segs = [1:length(x); length(x) + (1:length(x))]';
example2 = steno3d.line(segs, verts, 'r');
clear x verts segs;
Example 3: Plot Project with two Lines with data
x = 0:pi/10:4*pi;
example3 = steno3d.line(                                     ...
    x(:), cos(x(:)+0.2), sin(x(:)),                          ...
    'Vertex Data', x,                                        ...
    'Segment Data', (x(1:end-1) + x(2:end))/2                ...
);
steno3d.line(                                                ...
    example3, x, sin(x+0.2), cos(x), 'k',                    ...
    'Cosine Data', cos(x)                                    ...
);
clear x;
Example 4: Plot Project and Line, then edit the Line properties
x = 0:pi/10:4*pi;
[example4, lin] = steno3d.line(x, cos(x+0.2), sin(x), 'b');
example4.Title = 'Example 4 Project';
lin.Title = 'Blue Line';
lin.Opts.Opacity = .75;
example4.plot();
clear myLine x segs verts;
You can run the above examples with:
steno3d.examples.line
Then plot the projects with:
example1.plot(); % etc...
See also steno3d.line, steno3d.core.Line, steno3d.core.Project
surface plotting examples
Example 1: Create Steno3D Project with Surface resource from matrix Z
Z = peaks(20);
example1 = steno3d.surface(Z);
Example 2: Create Project with red Surface offset from origin
Z = peaks(20);
example2 = steno3d.surface([100 100 100], Z, 'r');
Example 3: Create Project with irregular-spaced and angled Surfaces
example3 = steno3d.surface([0:5:25 26:74 75:5:100],          ...
                           [25:2:45 46:54 55:2:75]);
steno3d.surface(                                             ...
    example3, 'Z', [0:10], [0.3 1 0], [0:100], [0 0 5]       ...
);
Example 4: Create Project with vertical Surface and Peaks topography
Z = peaks(20);
example4 = steno3d.surface('X', [0:2:10 11:18 19:2:29],      ...
                           'Z', [0:2:10 11:18 19:2:29],      ...
                           [0 0 0], Z);
Example 5: Add node data, cell-center data, and an image to the Surface
Z = peaks(20);
pngFile = [tempname '.png'];
imwrite(imread('ngc6543a.jpg'), pngFile, 'png');
[example5, mySurface] = steno3d.surface(                     ...
    1:5:100, 1:5:100, Z,                                     ...
    'Random Vertex Data', rand(20),                          ...
    'Random Face Data', rand(19),                            ...
    'Space Image', pngFile                                   ...
);
example5.Title = 'Example 5 Project';
mySurface.Title = 'Peaks, Data, and Space';
mySurface.Mesh.Opts.Wireframe = true;
example5.plot();
clear mySurface Z pngFile
You can run the above examples with:
steno3d.examples.surface
Then plot the projects with:
example1.plot(); % etc...
See also steno3d.surface, steno3d.core.Surface, steno3d.core.Project
trisurf plotting examples
Example 1: Create a Steno3D Project with triangulated Surface resource
x = [0 1 0 0]; y = [0 0 1 0]; z = [0 0 0 1];
tris = convhull(x, y, z);
example1 = steno3d.trisurf(tris, x, y, z);
clear x y z
Example 2: Create Project and blue Surface from triangles and vertices
verts = rand(100, 3)-0.5;
tris = convhull(verts(:, 1), verts(:, 2), verts(:, 3));
example2 = steno3d.trisurf(tris, verts, 'b');
Example 3: Create Project and Surface with node and cell-center data
verts = rand(100, 3)-0.5;
tris = convhull(verts(:, 1), verts(:, 2), verts(:, 3));
example3 = steno3d.trisurf(tris, verts,                      ...
    'Random Node Data', rand(size(verts, 1), 1),             ...
    'Random Face Data', rand(size(tris, 1), 1)               ...
);
Example 4: Create Project and two Surfaces from triangles and vertices
verts = rand(100, 3)-0.5;
tris = convhull(verts(:, 1), verts(:, 2), verts(:, 3));
[example4, mySurface] = steno3d.trisurf(tris, verts, 'b');
example4.Title = 'Example 4 Project';
mySurface.Title = 'Blue Surface';
[~, mySurface] = steno3d.trisurf(example4, tris, verts*2, 'y');
mySurface.Opts.Opacity = 0.25;
example4.plot();
clear mySurface verts tris
You can run the above examples with:
steno3d.examples.trisurf
Then plot the projects with:
example1.plot(); % etc...
See also steno3d.trisurf, steno3d.core.Surface, steno3d.core.Project
volume plotting examples
Example 1: Create Steno3D Project with a Volume resource from 3D matrix
V = flow;
example1 = steno3d.volume(V);
clear V;
Example 2: Create Project with Volume resource offset from origin
example2 = steno3d.volume([-12.5 5 -12.5], flow);
Example 3: Create Project with irregularly spaced Volume resource
xedge = [-20:2:-10 -9:9 10:2:20]; yedge = xedge; zedge = -10:10;
xcent = (xedge(1:end-1) + xedge(2:end))/2;
ycent = (yedge(1:end-1) + yedge(2:end))/2;
zcent = (zedge(1:end-1) + zedge(2:end))/2;
[X, Y, Z] = ndgrid(xcent, ycent, zcent);
dist = sqrt(X.*X + Y.*Y + Z.*Z*4);
example3 = steno3d.volume(xcent, ycent, zcent, dist);
clear xedge yedge zedge xcent ycent zcent X Y Z dist;
Example 4: Create Project with two Volumes
[xvals, yvals, zvals] = ndgrid(-8:4:8, -9:2:9, -9.5:9.5);
example4 = steno3d.volume(                                   ...
    4*ones(5, 1), 2*ones(10, 1), ones(20, 1), [-10 -10 -10], ...
    'X-Values', xvals, 'Y-Values', yvals, 'Z-Values', zvals  ...
);
[~, vol] = steno3d.volume(                                   ...
    example4, ones(20, 1), ones(20, 1), 2*ones(10, 1),       ...
    [-10 -10 15], 'Random Data', rand(20, 20, 10)            ...
);
vol.Opts.Opacity = 0.75;
vol.Mesh.Opts.Wireframe = true;
example4.plot();
clear xvals yvals zvals vol;
You can run the above examples with:
steno3d.examples.volume
Then plot the projects with:
example1.plot(); % etc...
See also steno3d.volume, steno3d.core.Volume, steno3d.core.Project
addData examples
Example 1: Create a Point resource and add untitled x-coordinate data
coords = rand(100, 3);
[example1, pts] = steno3d.scatter(coords, 'r');
steno3d.addData(pts, coords(:, 1));
clear coords pts
Example 2: Create a Surface and add random face data
x = [0 1 0 0]; y = [0 0 1 0]; z = [0 0 0 1];
tris = convhull(x, y, z);
example2 = steno3d.trisurf(tris, x, y, z, 'r');
steno3d.addData(example2.Resources{1}, 'Face Data', rand(4, 1));
clear x y z tris
Example 3: Create a grid Surface and add four datasets
Note
pks is a grid with 20x20 edges and 19x19 faces. Data of several different sizes can be added
[example3, pks] = steno3d.surface(peaks(20));
steno3d.addData(pks, 'Node Data from Matrix', rand(20, 20));
steno3d.addData(pks, 'Node Data from Array', rand(20*20, 1));
steno3d.addData(pks, 'Face Data from Matrix', rand(19, 19));
steno3d.addData(pks, 'Face Data from Array', rand(19*19, 1));
clear pks
You can run the above examples with:
steno3d.examples.adddata
Then plot the projects with:
example1.plot(); % etc...
See also steno3d.addData, steno3d.scatter, steno3d.trisurf, steno3d.surface
addImage examples
Example 1: Add a newly created PNG image to a Point resource
pngFile = [tempname '.png'];
imwrite(imread('ngc6543a.jpg'), pngFile, 'png');
[example1, pts] = steno3d.scatter(rand(1000, 3));
steno3d.addImage(pts, pngFile, 1, 1);
clear pngFile pts;
Example 2: Add three images to a Surface with varying orientations
pngFile = [tempname '.png'];
imwrite(imread('ngc6543a.jpg'), pngFile, 'png');
[example2, sfc] = steno3d.surface(                           ...
    'X', 0:.1:1, 'Z', 0:.1:1, [0 0 0]                        ...
);
steno3d.addImage(sfc, pngFile, 'X', .25, 'Z', .25);
steno3d.addImage(sfc, pngFile, 'X', .25, 'Z', .25,           ...
                 [.25 0 .25]);
steno3d.addImage(sfc, pngFile, [-1 0 0], .5, [0 0 -1], .5,   ...
                 [1 0 1], 'Reversed Space Image');
clear pngFile sfc;
Example 3: Project an image created with MATLAB texturemap on a sphere
fig = figure; [x, y, z] = sphere; surf(x, y, z);
h = findobj('Type', 'surface');
load earth; hemisphere = [ones(257,125), X, ones(257,125)];
set(h, 'CData', flipud(hemisphere), 'FaceColor', 'texturemap');
colormap(map); axis equal; view([90 0]);
fig.Position = [fig.Position(1:3) fig.Position(3)];
ax = gca; ax.Position = [0 0 1 1];
pngFile = [tempname '.png'];
print(fig, '-dpng', pngFile);
close(fig)
clear map X h hemisphere fig ax
verts = [x(:) y(:) z(:)];
tris = convhull(x(:), y(:), z(:));
[example3, sfc] = steno3d.trisurf(tris, verts);
steno3d.addImage(sfc, pngFile, 'X', 2, 'Z', 2, [-1 -1 -1],   ...
                 'Hemisphere');
clear x y z verts tris sfc pngFile;
You can run the above examples with:
steno3d.examples.addimage
Then plot the projects with:
example1.plot(); % etc...
See also steno3d.addImage, steno3d.scatter, steno3d.surface, steno3d.trisurf
combine project examples
Example 1: Combine three Steno3D Projects
pointProj = steno3d.scatter(rand(100, 3)); close;
lineProj = steno3d.line(-10:.1:0, sin(-10:.1:0), cos(-10:.1:0));
volProj = steno3d.volume([1 1 1], rand(5, 7, 10)); close; close;
example1 = steno3d.combine(pointProj, lineProj, volProj);
clear pointProj lineProj volProj;
Example 2: Combine two Projects converted from MATLAB figures
figure; peaks; peaksProj = steno3d.convert(gca); close;
figure; sphere; sphereProj = steno3d.convert(gca); close;
example2 = steno3d.combine(peaksProj, sphereProj);
example2.Title = 'Two-Surface Project';
clear peaksProj sphereProj;
Example 3: Combine four Projects converted from a multi-axes figure
fig = figure;
subplot(221); [x, y] = ndgrid(-3:.1:0, -3:.1:0); peaks(x, y);
subplot(222); [x, y] = ndgrid(-3:.1:0, .2:.1:3); peaks(x, y);
subplot(223); [x, y] = ndgrid(.2:.1:3, .2:.1:3); peaks(x, y);
subplot(224); [x, y] = ndgrid(.2:.1:3, -3:.1:0); peaks(x, y);
projs = steno3d.convert(fig);
example3 = steno3d.combine(projs);
close; clear fig x y projs;
You can run the above examples with:
steno3d.examples.combine
Then plot the projects with:
example1.plot(); % etc...
See also steno3d.combine, steno3d.convert, steno3d.scatter, steno3d.line, steno3d.volume
convert figures/axes examples
Example 1: Convert MATLAB axes to Steno3D Project
figure; peaks;
example1 = steno3d.convert(gca);
close;
Example 2: Convert figure with multiple graphics to Steno3D
figure; peaks; hold on; sphere; cylinder
example2 = steno3d.convert(gcf);
close;
Example 3: Combine four axes into one project with multiple resources
fig = figure;
subplot(221); [x, y] = ndgrid(-3:.1:0, -3:.1:0); peaks(x, y);
subplot(222); [x, y] = ndgrid(-3:.1:0, .2:.1:3); peaks(x, y);
subplot(223); [x, y] = ndgrid(.2:.1:3, .2:.1:3); peaks(x, y);
subplot(224); [x, y] = ndgrid(.2:.1:3, -3:.1:0); peaks(x, y);
example3 = steno3d.convert(fig, 'CombineAxes', true);
close; clear fig x y;
Example 4: Combine four axes and combine all their graphics
fig = figure;
subplot(221); [x, y] = ndgrid(-3:.1:0, -3:.1:0); peaks(x, y);
subplot(222); [x, y] = ndgrid(-3:.1:0, .2:.1:3); peaks(x, y);
subplot(223); [x, y] = ndgrid(.2:.1:3, .2:.1:3); peaks(x, y);
subplot(224); [x, y] = ndgrid(.2:.1:3, -3:.1:0); peaks(x, y);
example4 = steno3d.convert(fig, 'CombineAxes', true,         ...
                           'CombineResources', true);
close; clear fig x y; example4.plot();
You can run the above examples with:
steno3d.examples.convert
Then plot the projects with:
example1.plot(); % etc...
See also steno3d.convert
Core Resource Examples
Steno3D Low-Level Resource Construction Examples
Project - Steno3D Project examples
Point - Steno3D Point resource construction examples
Line - Steno3D Line resource construction examples
Surface - Steno3D Surface resource construction examples
Volume - Steno3D Volume resource construction examples
Data - Steno3D DataArray construction examples
Texture - Steno3D Texture2DImage construction examples
See also STENO3D.EXAMPLES
Example 1: Create a Steno3D Project with one resource
pts = steno3d.core.Point(                                    ...
    'Mesh', {'Vertices', rand(100, 3)}                       ...
);
example1 = steno3d.core.Project;
example1.Resources = pts;
clear pts;
Example 2: Create a Project with multiple resources
pts = steno3d.core.Point(                                    ...
    'Mesh', {'Vertices', rand(100, 3)}                       ...
);
sfc = steno3d.core.Surface(                                  ...
    'Mesh', {'H1', 0.1*ones(10, 1), 'H2', 0.1*ones(10, 1)}   ...
);
example2 = steno3d.core.Project;
example2.Title = 'Example 2';
example2.Description = 'Project with two resources';
example2.Public = true;
example2.Resources = {pts, sfc};
clear pts sfc;
Example 3: Create a Project with one resource then append another
pts = steno3d.core.Point(                                    ...
    'Mesh', {'Vertices', rand(100, 3)}                       ...
);
example3 = steno3d.core.Project(                             ...
    'Title', 'Example 3',                                    ...
    'Description', 'Project with one or two resources',      ...
    'Public', false,                                         ...
    'Resources', pts                                         ...
);
sfc = steno3d.core.Surface(                                  ...
    'Mesh', {'H1', 0.1*ones(10, 1), 'H2', 0.1*ones(10, 1)}   ...
);
example3.Resources{end+1} = sfc;
clear pts sfc;
Example 4: Create a project and add to it with high-level functions
example4 = steno3d.scatter(rand(100, 3));
steno3d.volume(example4, [1 1 1], rand(5, 10, 15));
You can run the above examples with:
steno3d.examples.core.project
Then plot the projects with:
example1.plot(); % etc...
See also steno3d.core.Project, steno3d.core.Point, steno3d.core.Surface, steno3d.scatter, steno3d.volume
Example 1: Create a basic Steno3D Point resource
pt = steno3d.core.Point;
verts = rand(100, 3);
mesh = steno3d.core.Mesh0D;
mesh.Vertices = verts;
pt.Mesh = mesh;
example1 = steno3d.core.Project;
example1.Resources = pt;
clear pt verts mesh;
Example 2: Create a Point resource and set display options
pt = steno3d.core.Point;
pt.Title = 'Example 2 Point';
pt.Description = 'This Point resource will be yellow';
mesh = steno3d.core.Mesh0D;
mesh.Vertices = rand(100, 3);
pt.Mesh = mesh;
pt.Opts.Color = 'y';
pt.Opts.Opacity = 0.75;
example2 = steno3d.core.Project;
example2.Title = 'Example 2';
example2.Description = 'Project with some points';
example2.Resources = pt;
clear pt mesh;
Example 3: Create a Point resource with node data
Note
This constructor encapsulates all the features of pt from Example 2.
verts = rand(100, 3);
pt = steno3d.core.Point(                                     ...
    'Title', 'Example 3 Point',                              ...
    'Description', 'This Point resource will have data',     ...
    'Mesh', steno3d.core.Mesh0D(                             ...
        'Vertices', verts                                    ...
    ),                                                       ...
    'Opts', {'Color', 'y', 'Opacity', 0.75}                  ...
);
xdata = steno3d.core.DataArray(                              ...
    'Title', 'X-Values',                                     ...
    'Array', verts(:, 1)                                     ...
);
pt.Data = {'Location', 'N', 'Data', xdata};
example3 = steno3d.core.Project(                             ...
    'Title', 'Example 3',                                    ...
    'Description', 'Project with some points',               ...
    'Resources', pt                                          ...
);
clear pt xdata verts;
Example 4: Create a Point resource with an image projected onto it
pt = steno3d.core.Point(                                     ...
    'Title', 'Example 4 Point',                              ...
    'Description', 'This Point resource will have an image', ...
    'Mesh', steno3d.core.Mesh0D(                             ...
        'Vertices', rand(100, 3)                             ...
    ),                                                       ...
    'Opts', {'Color', 'y', 'Opacity', 0.75}                  ...
);
pngFile = [tempname '.png'];
imwrite(imread('ngc6543a.jpg'), pngFile, 'png');
tex = steno3d.core.Texture2DImage(                           ...
    'Image', pngFile,                                        ...
    'O', [0 0 0],                                            ...
    'U', [1 0 0],                                            ...
    'V', [0 1 0]                                             ...
);
pt.Textures = tex;
example4 = steno3d.core.Project(                             ...
    'Title', 'Example 4',                                    ...
    'Description', 'Project with some points',               ...
    'Resources', pt                                          ...
);
clear pt tex pngFile;
Example 5: Create a Point resource with multiple datasets and textures
Note
There are several new features introduced in this highly consolidated construction. (1) Multiple datasets and textures are assigned as a cell array. (2) Passing cell arrays of parameters (e.g. for Mesh) implicitly calls the correct constructor. (3) Data Location is not specified since ‘N’ is the only available location for points. (4) The texture uses default values for O, U, and V, and attempts to coerce a JPG file to PNG.
verts = rand(100, 3);
pt = steno3d.core.Point(                                     ...
    'Title', 'Example 5 Point',                              ...
    'Description', 'This Point resource will have data',     ...
    'Mesh', {'Vertices', verts},                             ...
    'Opts', {'Color', 'y', 'Opacity', 0.75},                 ...
    'Data', {                                                ...
        {'Data', {'Title', 'X-Data', 'Array', verts(:, 1)}}, ...
        {'Data', {'Title', 'Y-Data', 'Array', verts(:, 2)}}, ...
        {'Data', {'Title', 'Z-Data', 'Array', verts(:, 3)}}  ...
    },                                                       ...
    'Textures', {                                            ...
        {'Image', 'ngc6543a.jpg', 'U', [.5 0 0]},            ...
        {'Image', 'ngc6543a.jpg', 'V', [0 .5 0]}             ...
    }                                                        ...
);
example5 = steno3d.core.Project(                             ...
    'Title', 'Example 5',                                    ...
    'Description', 'Project with some points',               ...
    'Resources', pt                                          ...
);
clear pt verts;
You can run the above examples with:
steno3d.examples.core.point
Then plot the projects with:
example1.plot(); % etc...
See also steno3d.core.Point, steno3d.core.Mesh0D, steno3d.core.Project, steno3d.core.DataArray, steno3d.core.Texture2DImage
Example 1: Create a basic Steno3D Line resource
lin = steno3d.core.Line;
verts = [0:30; sin(0:30); cos(0:30)]';
segs = [1:30; 2:31]';
mesh = steno3d.core.Mesh1D;
mesh.Vertices = verts;
mesh.Segments = segs;
lin.Mesh = mesh;
example1 = steno3d.core.Project;
example1.Resources = lin;
clear lin verts segs mesh;
Example 2: Create a Line resource and set display options
lin = steno3d.core.Line;
lin.Title = 'Example 2 Line';
lin.Description = 'This Line resource will be yellow tubes';
mesh = steno3d.core.Mesh1D;
mesh.Vertices = [0:30; sin(0:30); cos(0:30)]';
mesh.Segments = [1:30; 2:31]';
lin.Mesh = mesh;
lin.Opts.Color = 'y';
lin.Opts.Opacity = 0.75;
lin.Mesh.Opts.ViewType = 'tube';
example2 = steno3d.core.Project;
example2.Title = 'Example 2';
example2.Description = 'Project with a line';
example2.Resources = lin;
clear lin mesh;
Example 3: Create a Line resource with node data
Note
This constructor encapsulates all the features of lin from Example 2.
lin = steno3d.core.Line(                                     ...
    'Title', 'Example 3 Line',                               ...
    'Description', 'This Line resource will have data',      ...
    'Mesh', steno3d.core.Mesh1D(                             ...
        'Vertices', [0:30; sin(0:30); cos(0:30)]',           ...
        'Segments', [1:30; 2:31]',                           ...
        'Opts', {'ViewType', 'tube'}                         ...
    ),                                                       ...
    'Opts', {'Color', 'y', 'Opacity', 0.75}                  ...
);
cosdata = steno3d.core.DataArray(                            ...
    'Title', 'Cosine Values',                                ...
    'Array', cos(0:30)'                                      ...
);
lin.Data = {'Location', 'N', 'Data', cosdata};
example3 = steno3d.core.Project(                             ...
    'Title', 'Example 3',                                    ...
    'Description', 'Project with a line',                    ...
    'Resources', lin                                         ...
);
clear lin cosdata;
Example 4: Create a Steno3D Line with multiple datasets.
Note
There are a couple new features introduced in this consolidated construction. (1) Multiple datasets are assigned as a cell array. (2) Passing cell arrays of parameters (e.g. for Mesh) implicitly calls the correct constructor.
lin = steno3d.core.Line(                                     ...
    'Title', 'Example 4 Line',                               ...
    'Description', 'This Line resource will have data',      ...
    'Mesh', {'Vertices', [0:30; sin(0:30); cos(0:30)]',      ...
             'Segments', [1:30; 2:31]',                      ...
             'Opts', {'ViewType', 'tube'}},                  ...
    'Opts', {'Color', 'y', 'Opacity', 0.75},                 ...
    'Data', {{                                               ...
        'Location', 'CC',                                    ...
        'Data', {                                            ...
            'Title', 'CC Sine Data', 'Array', cos(.5:29.5)'  ...
        }                                                    ...
    }, {                                                     ...
        'Location', 'N',                                     ...
        'Data', {                                            ...
            'Title', 'Node Cosine Data', 'Array', cos(0:30)' ...
        }                                                    ...
    }}                                                       ...
);
example4 = steno3d.core.Project(                             ...
    'Title', 'Example 4',                                    ...
    'Description', 'Project with a line',                    ...
    'Resources', lin                                         ...
);
clear lin;
You can run the above examples with:
steno3d.examples.core.line
Then plot the projects with:
example1.plot(); % etc...
See also steno3d.core.Line, steno3d.core.Mesh1D, steno3d.core.Project, steno3d.core.DataArray
Example 1: Create a basic triangulated Steno3D Surface
sfc = steno3d.core.Surface;
verts = rand(100, 3);
tris = convhull(verts(:, 1), verts(:, 2), verts(:, 3));
mesh = steno3d.core.Mesh2D;
mesh.Vertices = verts;
mesh.Triangles = tris;
sfc.Mesh = mesh;
example1 = steno3d.core.Project;
example1.Resources = sfc;
clear sfc tris verts mesh;
Example 2: Create a basic grid Surface resource and set display options
sfc = steno3d.core.Surface;
sfc.Title = 'Example 2 Grid';
sfc.Description = 'This Surface will be yellow';
heights = peaks(20);
mesh = steno3d.core.Mesh2DGrid;
mesh.H1 = ones(19, 1);
mesh.H2 = ones(19, 1);
mesh.Z = heights(:);
sfc.Mesh = mesh;
sfc.Opts.Color = 'y';
sfc.Opts.Opacity = 0.75;
sfc.Mesh.Opts.Wireframe = true;
example2 = steno3d.core.Project;
example2.Title = 'Example 2';
example2.Description = 'Project with a surface';
example2.Resources = sfc;
clear sfc mesh heights;
Example 3: Create a Surface resource with cell-centered data
Note
This constructor encapsulates all the features of sfc (and more) from Example 1.
v = rand(100, 3);
t = convhull(v(:, 1), v(:, 2), v(:, 3));
sfc = steno3d.core.Surface(                                  ...
    'Title', 'Example 3 Surface',                            ...
    'Description', 'This Surface resource will have data',   ...
    'Mesh', steno3d.core.Mesh2D(                             ...
        'Vertices', v,                                       ...
        'Triangles', t,                                      ...
        'Opts', {'Wireframe', true}                          ...
    ),                                                       ...
    'Opts', {'Color', 'y', 'Opacity', 0.75}                  ...
);
trixloc = mean(reshape(v(t, 1), size(t)), 2);
xdata = steno3d.core.DataArray(                              ...
    'Title', 'X-Location',                                   ...
    'Array', trixloc                                         ...
);
sfc.Data = {'Location', 'CC', 'Data', xdata};
example3 = steno3d.core.Project(                             ...
    'Title', 'Example 3',                                    ...
    'Description', 'Project with a surface',                 ...
    'Resources', sfc                                         ...
);
clear sfc xdata v t;
Example 4: Create a Surface resource with an image projected onto it
v = rand(100, 3);
sfc = steno3d.core.Surface(                                  ...
    'Title', 'Example 4 Surface',                            ...
    'Description', 'This Surface resource has an image',     ...
    'Mesh', steno3d.core.Mesh2D(                             ...
        'Vertices', v,                                       ...
        'Triangles', convhull(v(:, 1), v(:, 2), v(:, 3)),    ...
        'Opts', {'Wireframe', true}                          ...
    ),                                                       ...
    'Opts', {'Color', 'y'}                                   ...
);
pngFile = [tempname '.png'];
imwrite(imread('ngc6543a.jpg'), pngFile, 'png');
tex = steno3d.core.Texture2DImage(                           ...
    'Image', pngFile,                                        ...
    'O', [-1 -1 0],                                          ...
    'U', [3 0 0],                                            ...
    'V', [0 3 0]                                             ...
);
sfc.Textures = tex;
example4 = steno3d.core.Project(                             ...
    'Title', 'Example 4',                                    ...
    'Description', 'Project with a surface',                 ...
    'Resources', sfc                                         ...
);
clear sfc tex pngFile v;
Example 5: Create a Surface resource with multiple datasets/textures
Note
There are several new features introduced in this highly consolidated construction. (1) Multiple datasets and textures are assigned as a cell array. (2) Passing cell arrays of parameters (e.g. for Mesh) implicitly calls the correct constructor. (3) Specifying O, U, and V in the Mesh2DGrid moves it away from the origin and rotates/skews the axes. (4) The texture attempts to coerce a JPG file to PNG.
pks = peaks(20);
sfc = steno3d.core.Surface(                                  ...
    'Title', 'Example 5 Grid',                               ...
    'Description', 'This Surface resource will have data',   ...
    'Mesh', {                                                ...
        'H1', 2*ones(19, 1),                                 ...
        'H2', 3*ones(19, 1),                                 ...
        'O', [-19 0 -28.5],                                  ...
        'U', [1 0 0],                                        ...
        'V', [.5 0 sqrt(3)/2],                               ...
        'Z', pks(:)                                          ...
    },                                                       ...
    'Opts', {'Color', 'y', 'Opacity', 0.75},                 ...
    'Data', {{                                               ...
        'Location', 'N',                                     ...
        'Data', {'Title', 'Peaks Data', 'Array', pks(:)}     ...
    }, {                                                     ...
        'Location', 'CC',                                    ...
        'Data', {'Title', 'Random', 'Array', rand(19*19, 1)} ...
    }},                                                      ...
    'Textures', {{                                           ...
        'Title', 'Aligned image',                            ...
        'Image', 'ngc6543a.jpg',                             ...
        'U', 38*[1 0 0],                                     ...
        'V', 57*[.5 0 sqrt(3)/2],                            ...
        'O', [-19 0 -28.5]                                   ...
    }, {                                                     ...
        'Title', 'Small square image',                       ...
        'Image', 'ngc6543a.jpg',                             ...
        'O', [-.5 0 -20],                                    ...
        'U', 'X',                                            ...
        'V', 'Z'                                             ...
    }}                                                       ...
);
example5 = steno3d.core.Project(                             ...
    'Title', 'Example 5',                                    ...
    'Description', 'Project with a surface',                 ...
    'Resources', sfc                                         ...
);
clear sfc;
You can run the above examples with:
steno3d.examples.core.surface
Then plot the projects with:
example1.plot(); % etc...
See also steno3d.core.Surface, steno3d.core.Mesh2D, steno3d.core.Mesh2DGrid, steno3d.core.Project, steno3d.core.DataArray, steno3d.core.Texture2DImage
Example 1: Create a Steno3D Volume resource with cell-centered data
Note
Unlike other Steno3D resources, Volumes require data
vol = steno3d.core.Volume;
xspacing = ones(5, 1);
yspacing = ones(10, 1);
zspacing = ones(15, 1);
mesh = steno3d.core.Mesh3DGrid;
mesh.H1 = xspacing;
mesh.H2 = yspacing;
mesh.H3 = zspacing;
vol.Mesh = mesh;
[x, ~, ~] = ndgrid(-2:2, -4.5:4.5, -7:7);
xdata = steno3d.core.DataArray;
xdata.Title = 'X Values';
xdata.Array = x(:);
vol.Data = {'Location', 'CC', 'Data', xdata};
example1 = steno3d.core.Project;
example1.Resources = vol;
clear vol xspacing yspacing zspacing mesh xdata x;
Example 2: Create a Volume resource offset from zero and set options
vol = steno3d.core.Volume;
vol.Title = 'Example 2 Volume';
vol.Description = 'This Volume resource will be yellow';
mesh = steno3d.core.Mesh3DGrid;
mesh.H1 = ones(5, 1);
mesh.H2 = ones(10, 1);
mesh.H3 = ones(15, 1);
mesh.O = [-2.5 -5 -7.5];
vol.Mesh = mesh;
vol.Opts.Color = 'y';
vol.Opts.Opacity = 0.75;
vol.Mesh.Opts.Wireframe = true;
[x, ~, ~] = ndgrid(-2:2, -4.5:4.5, -7:7);
xdata = steno3d.core.DataArray;
xdata.Title = 'X Values';
xdata.Array = x(:);
vol.Data = {'Location', 'CC', 'Data', xdata};
example2 = steno3d.core.Project;
example2.Title = 'Example 2';
example2.Description = 'Project with a volume';
example2.Resources = vol;
clear vol mesh xdata x;
Example 3: Create a Volume resource in a more compact way
vol = steno3d.core.Volume(                                   ...
    'Title', 'Example 3 Volume',                             ...
    'Description', 'This Volume resource will have data',    ...
    'Mesh', steno3d.core.Mesh3DGrid(                         ...
        'H1', ones(5, 1),                                    ...
        'H2', ones(10, 1),                                   ...
        'H3', ones(15, 1),                                   ...
        'O', [-2.5 -5 -7.5],                                 ...
        'Opts', {'Wireframe', true}                          ...
    ),                                                       ...
    'Opts', {'Color', 'y', 'Opacity', 0.75}                  ...
);
[x, ~, ~] = ndgrid(-2:2, -4.5:4.5, -7:7);
xdata = steno3d.core.DataArray(                              ...
    'Title', 'X Values',                                     ...
    'Array', x(:)                                            ...
);
vol.Data = {'Location', 'CC', 'Data', xdata};
example3 = steno3d.core.Project(                             ...
    'Title', 'Example 3',                                    ...
    'Description', 'Project with a volume',                  ...
    'Resources', vol                                         ...
);
clear vol xdata x;
Example 4: Create a Volume resource with multiple datasets
Note
There are a couple new features introduced in this consolidated construction. (1) Multiple datasets are assigned as a cell array. (2) Passing cell arrays of parameters (e.g. for Mesh) implicitly calls the correct constructor. (3) Data Location is not specified since ‘CC’ is the only available location for volumes.
[x, y, z] = ndgrid(-2:2, -4.5:4.5, -7:7);
vol = steno3d.core.Volume(                                   ...
    'Title', 'Example 4 Volume',                             ...
    'Description', 'This Volume resource will have data',    ...
    'Mesh', {'H1', ones(5, 1),                               ...
             'H2', ones(10, 1),                              ...
             'H3', ones(15, 1),                              ...
             'O', [-2.5 -5 -7.5],                            ...
             'Opts', {'Wireframe', true}},                   ...
    'Opts', {'Color', 'y', 'Opacity', 0.75},                 ...
    'Data', {                                                ...
        {'Data', {'Title', 'X Data', 'Array', x(:)}},        ...
        {'Data', {'Title', 'Y Data', 'Array', y(:)}},        ...
        {'Data', {'Title', 'Z Data', 'Array', z(:)}}         ...
    }                                                        ...
);
example4 = steno3d.core.Project(                             ...
    'Title', 'Example 4',                                    ...
    'Description', 'Project with a volume',                  ...
    'Resources', vol                                         ...
);
clear vol x y z;
You can run the above examples with:
steno3d.examples.core.volume
Then plot the projects with:
example1.plot(); % etc...
See also steno3d.core.Volume, steno3d.core.Mesh3DGrid, steno3d.core.DataArray, steno3d.core.Project
Example 1: Create a Point resource and add a DataArray with random data
pts = steno3d.core.Point;
pts.Mesh = steno3d.core.Mesh0D;
pts.Mesh.Vertices = rand(100, 3);
dat = steno3d.core.DataArray;
dat.Title = 'Random Point Data';
dat.Array = rand(100, 1);
pts.Data = {                                                 ...
    'Location', 'N',                                         ...
    'Data', dat                                              ...
};
example1 = steno3d.core.Project(                             ...
    'Title', 'Data: Example 1',                              ...
    'Resources', pts                                         ...
);
clear pts dat
Example 2: Create a Surface and add node and cell-center DataArrays
sfc = steno3d.core.Surface;
sfc.Mesh = steno3d.core.Mesh2DGrid;
sfc.Mesh.H1 = ones(5, 1);
sfc.Mesh.H2 = ones(10, 1);
ccValues = rand(5, 10);
datCC = steno3d.core.DataArray;
datCC.Title = 'Random Cell-Centered Data';
datCC.Array = ccValues(:);
nValues = rand(6, 11);
datN = steno3d.core.DataArray;
datN.Title = 'Random Node Data';
datN.Array = nValues(:);
sfc.Data{1} = {                                              ...
    'Location', 'CC',                                        ...
    'Data', datCC                                            ...
};
sfc.Data{2} = {                                              ...
    'Location', 'N',                                         ...
    'Data', datN                                             ...
};
example2 = steno3d.core.Project(                             ...
    'Title', 'Data: Example 2',                              ...
    'Resources', sfc                                         ...
);
clear sfc datCC datN ccValues nValues
You can run the above examples with:
steno3d.examples.core.data
Then plot the projects with:
example1.plot(); % etc...
See also steno3d.core.DataArray, steno3d.core.binders, steno3d.core.Point, steno3d.core.Mesh0D, steno3d.core.Surface, steno3d.core.Mesh2DGrid, steno3d.core.Project
Example 1: Create a Surface resource and add a Texture2DImage
sfc = steno3d.core.Surface;
sfc.Mesh = {'H1', ones(10, 1), 'H2', ones(10, 1)};
tex = steno3d.core.Texture2DImage;
tex.U = [10 0 0];
tex.V = [0 10 0];
pngFile = [tempname '.png'];
imwrite(imread('ngc6543a.jpg'), pngFile, 'png');
tex.Image = pngFile;
sfc.Textures = tex;
example1 = steno3d.core.Project(                             ...
    'Title', 'Textures: Example 1',                          ...
    'Resources', sfc                                         ...
);
clear sfc tex pngFile;
Example 2: Create a Point resource and add multiple textures
pts = steno3d.core.Point(                                    ...
    'Mesh', {'Vertices', rand(1000, 3)}                      ...
);
pts.Textures = steno3d.core.Texture2DImage(                  ...
    'U', 'X',                                                ...
    'V', 'Z',                                                ...
    'Image', 'ngc6543a.jpg'                                  ...
);
pts.Textures{end+1} = steno3d.core.Texture2DImage(           ...
    'O', [.25 .25 .25],                                      ...
    'U', [.4 0 -.3],                                         ...
    'V', [.1 .2 .5],                                         ...
    'Image', 'ngc6543a.jpg'                                  ...
);
example2 = steno3d.core.Project(                             ...
    'Title', 'Textures: Example 2',                          ...
    'Resources', pts                                         ...
);
clear pts;
Example 3: Add a texture to a sphere to make it look like Earth
Note
The Texture2DImage constructor is called implicitly when constructing sfc by providing a cell array of input parameters.
fig = figure; [x, y, z] = sphere; surf(x, y, z);
h = findobj('Type', 'surface');
load earth; hemisphere = [ones(257,125),X,ones(257,125)];
set(h,'CData',flipud(hemisphere),'FaceColor','texturemap');
colormap(map); axis equal; view([90 0]);
fig.Position = [fig.Position(1:3) fig.Position(3)];
ax = gca; ax.Position = [0 0 1 1];
pngFile = [tempname '.png'];
print(fig, '-dpng', pngFile);
close(fig);
clear map X h hemisphere fig ax;
sfc = steno3d.core.Surface(                                  ...
    'Title', 'Hemisphere',                                   ...
    'Mesh', {                                                ...
        'Triangles', convhull(x(:), y(:), z(:)),             ...
        'Vertices', [x(:) y(:) z(:)]                         ...
    },                                                       ...
    'Textures', {                                            ...
        'O', [-1 -1 -1],                                     ...
        'U', [2 0 0],                                        ...
        'V', [0 0 2],                                        ...
        'Image', pngFile                                     ...
    }                                                        ...
);
example3 = steno3d.core.Project(                             ...
    'Title', 'Textures: Example 3',                          ...
    'Resources', sfc                                         ...
);
clear sfc x y z pngFile;
You can run the above examples with:
steno3d.examples.core.texture
Then plot the projects with:
example1.plot(); % etc...
See also steno3d.core.Texture2DImage, steno3d.core.Point, steno3d.core.Surface, steno3d.core.Project
Core Resources
Command-line tools for building Steno3D objects from scratch
Steno3D Project:
steno3d.core.Project- Container of related Steno3D resources for plotting and uploading
Composite Resource Classes:
steno3d.core.Point- Low-level Steno3D Point resource
steno3d.core.Line- Low-level Steno3D Line resource
steno3d.core.Surface- Low-level Steno3D Surface resource
steno3d.core.Volume- Low-level Steno3D Volume resource
Mesh Classes:
steno3d.core.Mesh0D- Mesh for Steno3D Point resources
steno3d.core.Mesh1D- Mesh for Steno3D Line resources
steno3d.core.Mesh2D- Mesh for triangulated Steno3D Surface resources
steno3d.core.Mesh2DGrid- Mesh for gridded Steno3D Surface resources
steno3d.core.Mesh3DGrid- Mesh for Steno3D Volume resources
Data and Texture Classes:
steno3d.core.DataArray- Steno3D object to hold resource data
steno3d.core.Texture2DImage- Steno3D object to hold images and mapping to resources
Options/Binders/Base classes:
Options - Steno3D options for various classes
Data Binders - Binders to attach data to composite resources
steno3d.core.CompositeResource- Abstract base class for oPoint/Line/Surface/Volume
steno3d.core.UserContent- Abstract base class for other top-level classes
See the EXAMPLES
Project
-
class
steno3d.core.Project
Container of related Steno3D resources for plotting and uploading
Creating projects is the reason the Steno3D MATLAB toolbox exists. A
Project contains one or more related Point, Line, Surface, or Volume
resources. They can be created and edited using the high-level plotting
interface or the low-level command line interface.
Once a Project is created, it can be plotted in MATLAB with the plot()
function. This allows an initial visualization to verify the Project is
constructed correctly. After the Project is complete in MATLAB, it can
be uploaded to steno3d.com with the upload() function. This validates
the Project, checks user quotas, and uploads the Project. The URL of
the uploaded Project is returned and can also be accessed with the
url() function.
Project implements props.HasProps for dynamic, type-checked properties
Required Properties:
Public (
props.Bool) - Public visibility on steno3d.com, Default: falseResources (
props.Repeated) - Composite resources the project contains, Type: props.Instance (Class: CompositeResource)
Optional Properties:
Title (
props.String) - Content titleDescription (
props.String) - Content description
Available Methods:
upload:
p.upload()validates and uploads to steno3d.com the project or array of projectsp.url = p.upload()returns theurlor URLs of the uploaded project(s).url:
url = p.url()returns theurlof an uploaded projectpor cell array of URLs ifpis an array of projects. This method raises an error if a project isn’t uploaded.plot:
p.plot()plots the projectpin a new figure window. Ifpis an array of multiple projects, each is plotted in a new window.p.plot(ax)plots the project(s)pin an existing axesax.ax = p.plot(...)returnsax, the axes handle of the plot or a cell array of axes handles ifpis an array of multiple projects.It is recommended to call
plotwith no arguments (not provideax). This prevents loss of graphics objects unrelated to the project and ensures that uploading the axes will correctly upload the project.
See the EXAMPLES
See also steno3d.core.CompositeResource, steno3d.core.UserContent
Point
-
class
steno3d.core.Point
Low-level Steno3D Point resource
Points are 0D resources. Their geometry is defined by a Mesh0D with Vertices. They may have Data defined on the vertices (nodes). There are several point options available for customizing the appearance.
Point resources can also be created through a high-level functional
interface with steno3d.scatter().
Point implements props.HasProps for dynamic, type-checked properties
Required Properties:
Mesh (props.Instance) - Structure of the point resource, Class: Mesh0D
Optional Properties:
Data (
props.Repeated) - Data defined on the point resource, Type: props.Instance (Class: PointBinder)Textures (
props.Repeated) - Images mapped to the point resource, Type: props.Instance (Class: Texture2DImage)Opts (
props.Instance) - Options for the point resource, Class: PointOptionsTitle (
props.String) - Content titleDescription (
props.String) - Content description
See the EXAMPLES
See also steno3d.scatter, steno3d.core.Mesh0D, steno3d.core.binders, steno3d.core.opts.PointOptions, steno3d.core.CompositeResource, steno3d.core.Project
Line
-
class
steno3d.core.Line
Low-level Steno3D Line resource
Lines are 1D resources. Their geometry is defined by a Mesh1D as Vertices and connecting Segments. They may have Data that is either defined on the vertices (nodes) or the segments (cell-centers). There are several line options and mesh options available for customizing the appearance.
Line resources can also be created through a high-level functional
interface with steno3d.line().
Line implements props.HasProps for dynamic, type-checked properties
Required Properties:
Mesh (props.Instance) - Structure of the line resource, Class: Mesh1D
Optional Properties:
Data (
props.Repeated) - Data defined on the line resource, Type: props.Instance (Class: LineBinder)Opts (
props.Instance) - Options for the line resource, Class: LineOptionsTitle (
props.String) - Content titleDescription (
props.String) - Content description
See the EXAMPLES
See also steno3d.line, steno3d.core.Mesh1D, steno3d.core.binders, steno3d.core.opts.LineOptions, steno3d.core.CompositeResource, steno3d.core.Project
Surface
-
class
steno3d.core.Surface
Low-level Steno3D Surface resource
Surfaces are 2D resources. Their geometry is defined by either a triangulated Mesh2D or a regularly gridded Mesh2DGrid. Mesh2D has Vertices connected by Triangles; Mesh2DGrid has regular spacing defined on two axes. Surfaces may have Data defined either on the vertices (nodes) or the faces (cell-centers). There are several surface options and mesh options available for customizing the appearance.
Surface resources can also be created through a high-level functional
interface with steno3d.trisurf() (triangulated surface) or
steno3d.surface() (grid surface).
Surface implements props.HasProps for dynamic, type-checked properties
Required Properties:
Mesh (props.Union) - Structure of the surface resource, Types: props.Instance (Class: Mesh2D), props.Instance (Class: Mesh2DGrid)
Optional Properties:
Data (
props.Repeated) - Data defined on the surface resource, Type: props.Instance (Class: SurfaceBinder)Textures (
props.Repeated) - Images mapped to the surface resource, Type: props.Instance (Class: Texture2DImage)Opts (
props.Instance) - Options for the surface resource, Class: SurfaceOptionsTitle (
props.String) - Content titleDescription (
props.String) - Content description
See the EXAMPLES
See also steno3d.trisurf, steno3d.surface, steno3d.core.Mesh2D, steno3d.core.Mesh2DGrid, steno3d.core.binders, steno3d.core.opts.SurfaceOptions, steno3d.core.CompositeResource, steno3d.core.Project
Volume
-
class
steno3d.core.Volume
Low-level Steno3D Volume resource
Volumes are 3D resources. Their geometry is defined by a Mesh3DGrid with regularly spaced x-, y-, and z-axes. Volumes may have Data defined on the cell-centers. There are several volume options and mesh options available for customizing the appearance.
Volume resources can also be created through a high-level functional
interface with steno3d.volume.
Volume implements props.HasProps for dynamic, type-checked properties
Required Properties:
Mesh (
props.Instance) - Structure of the volume resource, Class: Mesh3DGridData (
props.Repeated) - Data defined on the volume resource, Type: props.Instance (Class: VolumeBinder)
Optional Properties:
Opts (
props.Instance) - Options for the volume resource, Class: VolumeOptionsTitle (
props.String) - Content titleDescription (
props.String) - Content description
See the EXAMPLES
See also steno3d.volume, steno3d.core.Mesh3DGrid, steno3d.core.binders, steno3d.core.opts.VolumeOptions, steno3d.core.CompositeResource, steno3d.core.Project
Mesh0D
-
class
steno3d.core.Mesh0D
Mesh for Steno3D Point resources
This mesh provides the geometry for Point resources, an n x 3 array of spatial coordinates where n is the number of points. There are currently no additional options available for this mesh.
Mesh0D implements props.HasProps for dynamic, type-checked properties
Required Properties:
Vertices (props.Array) - Spatial coordinates of points, Shape: {*, 3}, DataType: float
Optional Properties:
Opts (
props.Instance) - Options for the mesh, Class: Mesh0DOptionsTitle (
props.String) - Content titleDescription (
props.String) - Content description
See the EXAMPLES
See also steno3d.core.Point, steno3d.core.opts.Mesh0DOptions
Mesh1D
-
class
steno3d.core.Mesh1D
Mesh for Steno3D Line resources
This mesh provides the geometry for Line resources. It consists of an
m x 3 array of spatial vertices and an n x 2 array of vertex indices to
define the line segments. Segment values must be between 1 and m.
Mesh1D has additional options to customize the appearance of the line.
Mesh1D implements props.HasProps for dynamic, type-checked properties
Required Properties:
Vertices (
props.Array) - Spatial coordinates of line vertices, Shape: {*, 3}, DataType: floatSegments (
props.Array) - Endpoint vertex indices of line segments, Shape: {*, 2}, DataType: int
Optional Properties:
Opts (
props.Instance) - Options for the mesh, Class: Mesh1DOptionsTitle (
props.String) - Content titleDescription (
props.String) - Content description
See the EXAMPLES
Mesh2D
-
class
steno3d.core.Mesh2D
Mesh for triangulated Steno3D Surface resources
This mesh provides the geometry for triangulated Surface resources. It
consists of an m x 3 array of spatial vertices and an n x 3 array of
vertex indices to define the triangles. Triangle values must be between
1 and m. Mesh2D has additional options to customize the appearance of
the surface.
Mesh2D implements props.HasProps for dynamic, type-checked properties
Required Properties:
Vertices (
props.Array) - Spatial coordinates of surface vertices, Shape: {*, 3}, DataType: floatTriangles (
props.Array) - Vertex indices of surface triangles, Shape: {*, 3}, DataType: int
Optional Properties:
Opts (
props.Instance) - Options for the mesh, Class: Mesh2DOptionsTitle (
props.String) - Content titleDescription (
props.String) - Content description
See the EXAMPLES
See also steno3d.core.Surface, steno3d.core.opts.Mesh2DOptions
Mesh2DGrid
-
class
steno3d.core.Mesh2DGrid
Mesh for gridded Steno3D Surface resources
This mesh provides the geometry for gridded Surface resources. The grid cell widths are given by two arrays H1 and H2. By default, these correspond to the x- and y-direction, respectively, and the surface exists as a horizontal plane. However, alternative U- and V-axis vectors can be defined to orient the plane in any direction.
In addition to setting the axes, the Mesh2DGrid can be given any origin
point and can have node topography perpendicular to the surface (in the
U-cross-V direction, z-direction by default). Mesh2DGrid has additional
options to customize the appearance of the surface.
Mesh2DGrid implements props.HasProps for dynamic, type-checked properties
Required Properties:
H1 (
props.Array) - Grid cell widths in the U-direction, Shape: {*, 1}, DataType: floatH2 (
props.Array) - Grid cell widths in the V-direction, Shape: {*, 1}, DataType: floatO (
props.Vector) - Origin point from which H1- and H2-axes extend, Shape: {1, 3}, DataType: float, Default: [0 0 0]U (
props.Vector) - Orientation of H1 axis, Shape: {1, 3}, DataType: float, Default: [1 0 0]V (
props.Vector) - Orientation of H2 axis, Shape: {1, 3}, DataType: float, Default: [0 1 0]ZOrder (
props.String) - Array ordering of Z, Choices: c, f, Default: ‘f’
Optional Properties:
Z (
props.Array) - Node topography perpendicular to the surface, Shape: {*, 1}, DataType: floatOpts (
props.Instance) - Options for the mesh, Class: Mesh2DOptionsTitle (
props.String) - Content titleDescription (
props.String) - Content description
See the %ref[EXAMPLES](steno3d.examples.core.surface)
See also steno3d.core.Surface, steno3d.core.opts.Mesh2DOptions
Mesh3DGrid
-
class
steno3d.core.Mesh3DGrid
Mesh for Steno3D Volume resources
This mesh provides the geometry for Volume resources. It consists of x,
y, and z grid cell widths and an origin point. Mesh3DGrid has
additional options to customize the appearance of the volume.
Mesh3DGrid implements props.HasProps for dynamic, type-checked properties
Required Properties:
H1 (
props.Array) - Grid cell widths in the x-direction, Shape: {*, 1}, DataType: floatH2 (
props.Array) - Grid cell widths in the y-direction, Shape: {*, 1}, DataType: floatH3 (
props.Array) - Grid cell widths in the z-direction, Shape: {*, 1}, DataType: floatO (
props.Vector) - Origin point from which axes extend, Shape: {1, 3}, DataType: float, Default: [0 0 0]
Optional Properties:
Opts (
props.Instance) - Options for the mesh, Class: Mesh3DOptionsTitle (
props.String) - Content titleDescription (
props.String) - Content description
See the EXAMPLES
See also steno3d.core.Volume, steno3d.core.opts.Mesh3DOptions
DataArray
-
class
steno3d.core.DataArray
Steno3D object to hold resource data
Data is stored as an array. It is bound to a composite resource using a data binder cell array. The length of the Array must correspond to the specified mesh geometry location (nodes or cell centers). For some types of meshes, this is straightforward (e.g. using Mesh0D the Array must be equal in length to the Vertices). For gridded meshes (Mesh2DGrid, Mesh3DGrid), the Array must be unwrapped in the correct order. By default, if you have a matrix of the correct shape [X-length, Y-length(, Z-length)], flattening with matrix(:) gives the correct order.
A DataArray can also be added to a resource through a high-level
functional interface with steno3d.addData().
DataArray implements props.HasProps for dynamic, type-checked properties
Required Properties:
Array (
props.Array) - Data corresponding to geometry of the mesh, Shape: {*, 1}, DataType: floatOrder (
props.String) - Data array order, for data on grid meshes, Choices: c, f, Default: ‘f’
Optional Properties:
Title (
props.String) - Content titleDescription (
props.String) - Content description
See the EXAMPLES
See also steno3d.addData, steno3d.core.binders, steno3d.core.CompositeResource, steno3d.core.Texture2DImage
Texture2DImage
-
class
steno3d.core.Texture2DImage
Steno3D object to hold images and mapping to resources
Image textures are used to map data to a Steno3D resource in space
without requiring an array that corresponds to geometry. Images must be
PNG files (or MATLAB matrices that can be written as PNGs with
imwrite). In addion to the image, Texture2DImage contains spatial
location given by axes vectors U and V extending from an origin point.
The image is mapped on to the resource by projecting it out of the
plane defined by the origin, U, and V, in a U-cross-V direction. Only
Points and Surfaces support Texture2DImage; Lines and Volumes do not.
A Texture2DImage can also be added to a resource through a high-level
functional interface with steno3d.addImage(). The function
steno3d.surface() also allows creation of a surface with an image.
Texture2DImage implements props.HasProps for dynamic, type-checked properties
Required Properties:
U (
props.Vector) - Vector corresponding to the image x-axis, Shape: {1, 3}, DataType: float, Default: [1 0 0]V (
props.Vector) - Vector corresponding to the image y-axis, Shape: {1, 3}, DataType: float, Default: [0 1 0]O (
props.Vector) - Origin point from which U- and V-axes extend, Shape: {1, 3}, DataType: float, Default: [0 0 0]Image (
props.Image) - PNG image file
Optional Properties:
Title (
props.String) - Content titleDescription (
props.String) - Content description
See the EXAMPLES
See also steno3d.addImage, steno3d.surface, steno3d.core.Point, steno3d.core.Surface, steno3d.core.DataArray
Options
Adding options to resources in Steno3D
Most Steno3D objects have options to customize their appearance. These are set with Options objects. See the specific Options type to see the available options.
It is not necessary to construct options objects explicitly; they can be created implicitly using cell arrays as shown in the example below.
% Initialize a Steno3D Surface resource
mySurface = steno3d.core.Surface;
mySurface.Mesh = steno3d.core.Mesh2DGrid(                    ...
    'H1', ones(10, 1),                                       ...
    'H2', ones(20, 1)                                        ...
);

% Explicit options construction (NOT RECOMMENDED)
myPoint.Opts = steno3d.core.opts.PointOptions(               ...
    'Opacity', .75, 'Color', 'r'                             ...
);
myPoint.Mesh.Opts = steno3d.core.opts.Mesh2DOptions(         ...
    'Wireframe', true                                        ...
);

% Implicit data binder construction (RECOMMENDED)
myPoint.Opts = {'Opacity', .75, 'Color', 'r'};
myPoint.Mesh.Opts = {'Wireframe', true};
Options Types:
steno3d.core.opts.PointOptions- Options for Steno3D Point
steno3d.core.opts.LineOptions- Options for Steno3D Line
steno3d.core.opts.SurfaceOptions- Options for Steno3D Surface
steno3d.core.opts.VolumeOptions- Options for Steno3D Volume
steno3d.core.opts.Mesh0DOptions- Options for Steno3D Mesh0D
steno3d.core.opts.Mesh1DOptions- Options for Steno3D Mesh1D
steno3d.core.opts.Mesh2DOptions- Options for Steno3D Mesh2D and Mesh2DGrid
steno3d.core.opts.Mesh3DOptions- Options for Steno3D Mesh3DGrid
steno3d.core.opts.Options- Abstract base class for Steno3D options
-
class
steno3d.core.opts.PointOptions
Options for Steno3D Point objects
For usage details, see the options help.
PointOptions implements props.HasProps for dynamic, type-checked properties
Optional Properties:
Color (
props.Color) - Point color, Default: ‘random’Opacity (
props.Float) - Point opacity, Minimum: 0, Maximum: 1, Default: 1
See the point EXAMPLES
See also steno3d.core.opts, steno3d.core.Point
-
class
steno3d.core.opts.LineOptions
Options for Steno3D Line objects
For usage details, see the options help.
LineOptions implements props.HasProps for dynamic, type-checked properties
Optional Properties:
Color (
props.Color) - Solid line color, Default: ‘random’Opacity (
props.Float) - Line opacity, Minimum: 0, Maximum: 1, Default: 1
See the line EXAMPLES
See also steno3d.core.opts, steno3d.core.Line
-
class
steno3d.core.opts.SurfaceOptions
Options for Steno3D Surface objects
For usage details, see the options help.
SurfaceOptions implements props.HasProps for dynamic, type-checked properties
Optional Properties:
Color (
props.Color) - Solid surface color, Default: ‘random’Opacity (
props.Float) - Surface opacity, Minimum: 0, Maximum: 1, Default: 1
See the surface EXAMPLES
See also steno3d.core.opts, steno3d.core.Surface
-
class
steno3d.core.opts.VolumeOptions
Options for Steno3D Volume objects
For usage details, see the options help.
VolumeOptions implements props.HasProps for dynamic, type-checked properties
Optional Properties:
Color (
props.Color) - Solid volume color, Default: ‘random’Opacity (
props.Float) - Volume opacity, Minimum: 0, Maximum: 1, Default: 1
See the volume EXAMPLES
See also steno3d.core.opts, steno3d.core.Volume
-
class
steno3d.core.opts.Mesh0DOptions
Options for Steno3D Mesh0D objects
For usage details, see the options help.
Mesh0DOptions implements props.HasProps for dynamic, type-checked properties
—- Class has no properties —-
See the point EXAMPLES
See also steno3d.core.opts, steno3d.core.Mesh0D
-
class
steno3d.core.opts.Mesh1DOptions
Options for Steno3D Mesh1D objects
For usage details, see the options help.
Mesh1DOptions implements props.HasProps for dynamic, type-checked properties
Optional Properties:
ViewType (props.String) - Display 1D lines or tubes/boreholes/extruded lines, Choices: line, tube, Default: ‘line’
See the line EXAMPLES
See also steno3d.core.opts, steno3d.core.Mesh1D
-
class
steno3d.core.opts.Mesh2DOptions
Options for Steno3D Mesh2D and Mesh2DGrid objects
For usage details, see the options help.
Mesh2DOptions implements props.HasProps for dynamic, type-checked properties
Optional Properties:
Wireframe (props.Bool) - Display 2D mesh wireframe, Default: false
See the surface EXAMPLES
See also steno3d.core.opts, steno3d.core.Mesh2D, steno3d.core.Mesh2DGrid
-
class
steno3d.core.opts.Mesh3DOptions
Options for Steno3D Mesh3DGrid objects
For usage details, see the options help.
Mesh3DOptions implements props.HasProps for dynamic, type-checked properties
Optional Properties:
Wireframe (props.Bool) - Display 3D mesh wireframe, Default: false
See the volume EXAMPLES
See also steno3d.core.opts, steno3d.core.Mesh3DGrid
-
class
steno3d.core.opts.Options
Abstract base class for Steno3D options
For usage details, see the options help.
See also steno3d.core.opts
Data Binders
Adding data to resources in Steno3D
Steno3D uses data binders to bind DataArrays to CompositeResources. Because of this, the “Data” property of a resource is a binder (or cell array of binders). These binders each have two properties:
Data- DataArray with title, description, array, etc.
Location- Geometry element to which data is bound, either ‘N’- (nodes) or ‘CC’ (cell-centers).
It is not necessary to construct binder objects explicitly; they can be created implicitly using cell arrays as shown in the example below.
% Initialize a Steno3D Point resource
myPoint = steno3d.core.Point;
myPoint.Mesh = steno3d.core.Mesh0D('Vertices', rand(100, 3));
randomData1 = steno3d.core.DataArray(                        ...
    'Title', 'Random Point Data',                            ...
    'Array', rand(100, 1)                                    ...
);

% Explicit data binder construction (NOT RECOMMENDED)
myPoint.Data = steno3d.core.binders.PointBinder(             ...
    'Location', 'N', 'Data', randomData1                     ...
);

% Implicit data binder construction (RECOMMENDED)
myPoint.Data = {'Location', 'N', 'Data', randomData1};

% Adding multiple datasets to one resource
randomData2 = steno3d.core.DataArray(                        ...
    'Title', 'More Random Point Data',                       ...
    'Array', rand(100, 1)                                    ...
);
randomData3 = steno3d.core.DataArray(                        ...
    'Title', 'Another Random Point Data',                    ...
    'Array', rand(100, 1)                                    ...
);
myPoint.Data = {                                             ...
    {'Location', 'N', 'Data', randomData1},                  ...
    {'Location', 'N', 'Data', randomData2},                  ...
    {'Location', 'N', 'Data', randomData3}                   ...
};
Binder types:
steno3d.core.binders.PointBinder- Bind data to nodes of a Steno3D Point
steno3d.core.binders.LineBinder- Bind data to segments or vertices of a Steno3D Line
steno3d.core.binders.SurfaceBinder- Bind data to faces or vertices of a Steno3D Surface
steno3d.core.binders.VolumeBinder- Bind data to cell centers of a Steno3D Volume
For more examples see the DataArray examples
See also steno3d.core.DataArray, steno3d.addData
-
class
steno3d.core.binders.PointBinder
Bind data to nodes of a Steno3D Point
For usage details, see the binders help.
PointBinder implements props.HasProps for dynamic, type-checked properties
Required Properties:
Location (
props.String) - Location of the data on mesh, Choices: N, Default: ‘N’Data (
props.Instance) - Point data array, Class: DataArray
See the point EXAMPLES
See also steno3d.core.binders, steno3d.core.DataArray, steno3d.core.Point
-
class
steno3d.core.binders.LineBinder
Bind data to segments or vertices of a Steno3D Line
For usage details, see the binders help.
LineBinder implements props.HasProps for dynamic, type-checked properties
Required Properties:
Location (
props.String) - Location of the data on mesh, Choices: CC, NData (
props.Instance) - Line data array, Class: DataArray
See the line EXAMPLES
See also steno3d.core.binders, steno3d.core.DataArray, steno3d.core.Line
-
class
steno3d.core.binders.SurfaceBinder
Bind data to faces or vertices of a Steno3D Surface
For usage details, see the binders help.
SurfaceBinder implements props.HasProps for dynamic, type-checked properties
Required Properties:
Location (
props.String) - Location of the data on mesh, Choices: CC, NData (
props.Instance) - Surface data array, Class: DataArray
See the surface EXAMPLES
See also steno3d.core.binders, steno3d.core.DataArray, steno3d.core.Surface
-
class
steno3d.core.binders.VolumeBinder
Bind data to cell centers of a Steno3D Volume
For usage details, see the binders help.
VolumeBinder implements props.HasProps for dynamic, type-checked properties
Required Properties:
Location (
props.String) - Location of the data on mesh, Choices: CC, Default: ‘CC’Data (
props.Instance) - Volume data array, Class: DataArray
See the volume EXAMPLES
See also steno3d.core.binders, steno3d.core.DataArray, steno3d.core.Volume
CompositeResource
-
class
steno3d.core.CompositeResource
Abstract base class for Steno3D resources (Point, Line, etc)
Composite resources are the building blocks of Steno3D Projects. They include Point, Line, Surface, and Volume. They all must have a mesh to define their geometry. They may also have data bound to the mesh, image textures, and options.
See also steno3d.core.Point, steno3d.core.Line, steno3d.core.Surface, steno3d.core.Volume, steno3d.core.UserContent, steno3d.core.Project
UserContent
-
class
steno3d.core.UserContent
Abstract base class for all uploadable Steno3D content
The main purpose of the Steno3D MATLAB Toolbox is uploading plots and
projects to steno3d.com. UserContent provides upload functionality
to Steno3D objects. It also inherits behavior from HasProps, providing
dynamically created, type-checked properties.
See also steno3d.core.CompositeResource, steno3d.core.Project
Utilities
Non-user-facing support functions for the Steno3D package
Props MATLAB Package
The Props MATLAB package facilitates the creation of classes with type-checked, validated properties through a relatively simple, declarative interface.
Base Classes:
props.Prop- Basic property with no given type
props.HasProps- Class with dynamically created, declarative Props
Prop Types:
props.Array- Multi-dimensional float or int array prop
props.Bool- Boolean prop
props.Color- RGB, Hex, or string color prop
props.Float- Float prop
props.Image- PNG image prop
props.Instance- Prop that is an instance of a given class
props.Int- Integer prop
props.Repeated- Prop that is a repeated number of another type of prop
props.String- String prop
props.Union- Prop that may be one of several different types of props
props.Vector- Three-component vector prop
Note
Props requires MATLAB R2014b or greater
Prop
-
class
props.Prop
Basic property with no given type
Used with subclasses of props.HasProps, a PROPS.PROP instance is created dynamically on class instantiation based on a declarative, immutable property of the props.HasProps class. For more information about to use PROPS.PROP, see props.HasProps or the specific types listed below.
Attributes:
- Value:
- The saved value of the PROPS.PROP.
- Name:
- The name used to access the value of PROPS.PROP from the props.HasProps class.
- Doc:
- A description of the specific PROPS.PROP on a props.HasProps class.
- Required:
- Whether or not the PROPS.PROP must be given a value for a props.HasProps instance to pass validation.
- ValidateDefault:
- Whether or not the DefaultValue must pass validation.
- DefaultValue:
- The default value when the PROPS.PROP is accessed prior to getting set.
See also PROPS.HASPROPS, PROPS.ARRAY, PROPS.BOOL, PROPS.COLOR, PROPS.FLOAT, PROPS.IMAGE, PROPS.INSTANCE, PROPS.INT, PROPS.REPEATED, PROPS.STRING, PROPS.UNION, PROPS.VECTOR
HasProps
-
class
props.HasProps
Class with dynamically created, declarative Props
PROPS.HASPROPS is designed to aid creation of classes by providing a declarative interface for creating type-checked, validated and cross-validated properties.
- DECLARING DYNAMIC PROPS:
The props of a PROPS.HASPROPS subclass are declared in an immutable property that is a cell array of structs. It is recommended but not required to set this property to ‘Hidden’ since it is unused after class instantiated.
The required fields of each struct in this immutable cell array are ‘Name’ (the name by which the prop value will be accessed), ‘Type’ (a handle to the type of prop), and ‘Doc’ (a description of the prop). Optional fields include ‘Required’ and ‘DefaultValue’, and specific types of props may have additional fields.
- ADDING VALIDATION:
Individual Props are validated, type-checked, and possibly coerced to new values when set. This validation logic is defined in the specific Prop class.
PROPS.HASPROPS classes also have a framework for cross-validating properties. To utilize this, define a “validator()” method that checks prop combinations and errors if they are invalid. Then, when you call “validate()” on the PROPS.HASPROPS instance, all the validation methods will be called recursively.
- INSTANTIATING THE CLASS:
Upon instantiation, each struct declared in the immutable cell array will be converted into two properties: and accessible property, Name, that is used to get and set the prop value, and a hidden property, PR_Name, the underlying instance of props.Prop where the value is actually validated and stored.
PROPS.HASPROPS allows you to assign prop values on instantiation by passing in Parameter/Value pairs. However, this requires defining a constructor method that passes varargin to the PROPS.HASPROPS constructor. If this constructor is not defined, the default constructor takes no arguments, and passing Parameter/Value pairs will result in an error.
For a substantial practical example, look at the Steno3D MATLAB client on github.
See also props.Prop
Array
-
class
props.Array
Multi-dimensional float or int array prop
This is a type of props.Prop that can be used when a props.HasProps class needs a numeric array property.
Attributes (in addition to those inherited from props.Prop):
- Shape:
A nested cell array describing the shape of the array where the n-th entry must correspond to size(array, n). If an entry is ‘*’, that dimension can be any size. Note: The requirement for nesting the cell array is necessary to subvert MATLAB’s default treatment of cell arrays contained in structs.
Example:
IfShape = {{1, 3, '*'}}, valid array sizes include[1, 3, 1],[1, 3, 100], etc. Invalid array sizes include[1, 3],[1, 3, 100, 1],[3, 1, 100].- Binary:
- If true, array is written to binary when serialized to a file. If false, array is written as a string when serialized.
- DataType:
floatorint- IndexArray:
- If true, the array is saved as as (array - 1) for compatibility with zero-indexed languages. If false, the array is saved as-is.
Example:
...
class HasArrayProp < props.HasProps
    properties (Hidden, SetAccess = immutable)
        ArrayPropStruct = {                                     ...
            struct(                                             ...
                'Name', 'ThreeColumns',                         ...
                'Type', @props.Array,                           ...
                'Doc', 'Three column array, saved as binary',   ...
                'Shape', {{'*', 3}},                            ...
                'Binary', true,                                 ...
                'DataType', 'float'                             ...
            )                                                   ...
        }
    end
    ...
end
See also props.Prop, props.HasProps, props.Float, props.Int, props.Repeated, props.Image
Bool
-
class
props.Bool
Boolean prop
This is a type of props.Prop that can be used when a props.HasProps class needs a boolean property.
Attributes - No properties besides those inherited from props.Prop
Example:
...
class HasBoolProp < props.HasProps
    properties (Hidden, SetAccess = immutable)
        BoolPropStruct = {                                      ...
            struct(                                             ...
                'Name', 'IsSomething',                          ...
                'Type', @props.Bool,                            ...
                'Doc', 'Is it something?',                      ...
                'DefaultValue', true                            ...
            )                                                   ...
        }
    end
    ...
end
See also props.Prop, props.HasProps, props.Int
Color
-
class
props.Color
RGB, Hex, or string color prop
This is a type of props.Prop that can be used when a props.HasProps class needs a color property. Examples of valid colors include:
- 8-bit RGB colors with values betweeon 0-255 (e.g. [0 128 255])
- MATLAB RGB colors with values between 0-1 (e.g. [0 .5 .5])
- Hex string colors with 6 digits (e.g. ‘#0080FF’)
- Hex string colors with 3 digits (e.g. ‘#F50’)
- MATLAB color letters (e.g. ‘y’)
- Standard, named web colors (e.g. ‘papayawhip’)
- Random color (‘random’)
All of these are converted to and stored as their equivalent 8-bit RGB color.
Attributes - No properties besides those inherited from props.Prop
Example:
...
class HasColorProp < props.HasProps
    properties (Hidden, SetAccess = immutable)
        ColorPropStruct = {                                     ...
            struct(                                             ...
                'Name', 'FaceColor',                            ...
                'Type', @props.Color,                           ...
                'Doc', 'Color of the object',                   ...
                'DefaultValue', 'random'                        ...
            )                                                   ...
        }
    end
    ...
end
See also props.Prop, props.HasProps, props.Vector, props.Instance
Float
-
class
props.Float
Float prop
This is a type of props.Prop that can be used when a props.HasProps class needs a float property.
Attributes (in addition to those inherited from props.Prop):
- MinValue:
- The minimum allowed value for the property. The default is -Inf (no minimum).
- MaxValue:
- The maximum allowed value for the property. The default is Inf (no maximum).
Example:
...
class HasFloatProp < props.HasProps
    properties (Hidden, SetAccess = immutable)
        FloatPropStruct = {                                     ...
            struct(                                             ...
                'Name', 'PositiveFloat',                        ...
                'Type', @props.Float,                           ...
                'Doc', 'A positive number',                     ...
                'MinValue', 0                                   ...
            )                                                   ...
        }
    end
    ...
end
See also props.Prop, props.HasProps, props.Int, props.Array
Image
-
class
props.Image
PNG image prop
This is a type of props.Prop that can be used when a props.HasProps class needs an image property. Only PNG images are currently supported. Valid values are either PNG filenames that can be read with imread or valid PNG matrices already in MATLAB. Image will attempt to coerce different image formats to PNG, but the success may be limited.
Attributes - No properties besides those inherited from props.Prop
Example:
...
class HasImageProp < props.HasProps
    properties (Hidden, SetAccess = immutable)
        ImagePropStruct = {                                     ...
            struct(                                             ...
                'Name', 'SomePicture',                          ...
                'Type', @props.Image,                           ...
                'Doc', 'Some PNG image'                         ...
            )                                                   ...
        }
    end
    ...
end
See also props.Prop, props.HasProps, props.Array, props.Color
Instance
-
class
props.Instance
Prop that is an instance of a given class
This is a type of props.Prop that can be used when a props.HasProps class needs a property that is an instance of any Class. If the instance class is also a subclass of props.HasProps, it will be recursively validated on a call to ‘validate()’.
Attributes (in addition to those inherited from props.Prop):
- Class:
- Handle to the type of instance this prop requires. This may be any MATLAB class. If the Class is another subclass of props.HasProps it will benefit from additional recursive validation. Even circular Class assignment (for example having a class use itself as a PROPS.INSTANCE) can be achieved by setting Class = eval(‘@CurcularClass’), as long as the eval function is valid at runtime.
- Args:
- Cell array of default arguments used to construct the DynamicDefault value of the class if Initialize is true. If Initialize is false, Args are unused.
- Initialize:
- Whether or not to auto-create an instance of the class for the property. If Initialize is true, valid Args must be provided as well. If Initialize is false, Required or ValidateDefault will likely need to be false as well. Otherwise, PROPS.INSTANCE will attempt to validate the uninitialized (empty) default value and probably fail.
Example:
...
class HasInstanceProp < props.HasProps
    properties (Hidden, SetAccess = immutable)
        InstancePropStruct = {                                  ...
            struct(                                             ...
                'Name', 'FigureInstance',                       ...
                'Type', @props.Instance,                        ...
                'Doc', 'An auto-created figure property',       ...
                'Class', @matlab.ui.Figure,                     ...
                'Initialize', true                              ...
            )                                                   ...
        }
    end
    ...
end
See also props.Prop, props.HasProps, props.Union, props.Repeated
Int
-
class
props.Int
Integer prop
This is a type of props.Prop that can be used when a props.HasProps class needs an integer property.
Attributes - No properties besides those inherited from props.Float
Example:
...
class HasIntProp < props.HasProps
    properties (Hidden, SetAccess = immutable)
        IntPropStruct = {                                       ...
            struct(                                             ...
                'Name', 'Int0to10',                             ...
                'Type', @props.Int,                             ...
                'Doc', 'An integer between 0 and 10',           ...
                'MinValue', 0,                                  ...
                'MaxValue', 10                                  ...
            )                                                   ...
        }
    end
    ...
end
See also props.Prop, props.HasProps, props.Float, props.Array, props.Bool
Repeated
-
class
props.Repeated
Prop that is a repeated number of another type of prop
This is a type of props.Prop that can be used when a props.HasProps class needs a property that can be multiple values of one types. PROPS.REPEATED stores the repeated values in a cell array; each value is validated.
Attributes (in addition to those inherited from props.Prop):
- PropType:
- A struct that defines another valid prop type. This struct requires Type handle but not Name or Doc - those are inherited from the PROPS.REPEATED values.
Example:
...
class HasRepeatedProp < props.HasProps
    properties (Hidden, SetAccess = immutable)
        RepeatedPropStruct = {                                  ...
            struct(                                             ...
                'Name', 'MultipleColors',                       ...
                'Type', @props.Repeated,                        ...
                'Doc', 'This propery can hold multiple colors', ...
                'PropType', struct(                             ...
                    'Type', @props.Color                        ...
                )                                               ...
            )                                                   ...
        }
    end
    ...
end
See also props.Prop, props.HasProps, props.Union, props.Array, props.Color
String
-
class
props.String
String prop
This is a type of props.Prop that can be used when a props.HasProps class needs a string property. PROPS.STRING can either accept any string or only certain spcecified strings.
Attributes (in addition to those inherited from props.Prop):
- Choices:
- The available choices for the string property. If choices is not specified, any string will be considered valid. If choices is a nested cell array of strings, only those choices are valid. Choices may also be a struct with strings as fields and nested cell array of strings as values. This allows several different strings (the values) to be coerced into a single string (the field). Note: The requirement for nesting the cell array is necessary to subvert MATLAB’s default treatment of cell arrays contained in structs. See example below for the implementation of each of these types of Choices.
- Lowercase:
- If true, the input string is coerced to all-lowercase. If false and Choices are set, the string is coerced to the case found in Choices. If false and Choices is not set, the string is kept as-is.
Example:
...
class HasStringProps < props.HasProps
    properties (Hidden, SetAccess = immutable)
        StringPropsStruct = {                                   ...
            struct(                                             ...
                'Name', 'AnyString',                            ...
                'Type', @props.String,                          ...
                'Doc', 'This property can be any string'        ...
            ), struct(                                          ...
                'Name', 'ChoiceString',                         ...
                'Type', @props.String,                          ...
                'Doc', 'This property can only be hi or bye',   ...
                'Choices', {{'hi', 'bye'}},                     ...
                'DefaultValue', 'hi'                            ...
            ), struct(                                          ...
                'Name', 'CoercedChoiceString',                  ...
                'Type', @props.String,                          ...
                'Doc', 'This coerces hi and bye to English',    ...
                'Choices', struct(                              ...
                    'hi', {{'hola', 'bonjour', 'guten tag'}},   ...
                    'bye', {{'adios', 'au revoir',              ...
                             'auf Wiedersehen'}}                ...
                ),                                              ...
                'DefaultValue', 'hi'                            ...
            )                                                   ...
        }
    end
    ...
end
See also props.Prop, props.HasProps, props.Color, props.Bool
Union
-
class
props.Union
Prop that may be one of several different types of props
This is a type of props.Prop that can be used when a props.HasProps class needs a property that can be multiple types. When the property is assigned, PROPS.UNION attempts to validate it as each type until it succeeds.
Attributes (in addition to those inherited from props.Prop):
- PropTypes:
- A nested cell array of structs that define the valid prop types. The structs in PropTypes require Type handle but do not require Name or Doc - those are inherited from the PROPS.UNION values. Note: The requirement for nesting the cell array is necessary to subvert MATLAB’s default treatment of cell arrays contained in structs. See the example below for how this is implemented.
Example:
...
class HasUnionProp < props.HasProps
    properties (Hidden, SetAccess = immutable)
        UnionPropStruct = {                                     ...
            struct(                                             ...
                'Name', 'StringOrInt',                          ...
                'Type', @props.Union,                           ...
                'Doc', 'This property is a string or an int>0', ...
                'PropTypes', {{struct(                          ...
                    'Type', @props.Int,                         ...
                    'MinValue', 0                               ...
                ), struct(                                      ...
                    'Type', @props.String                       ...
                )}}                                             ...
            )                                                   ...
        }
    end
    ...
end
See also props.Prop, props.HasProps, props.Int, props.String, props.Repeated, props.Instance
Vector
-
class
props.Vector
Three-component vector prop
This is a type of props.Prop that can be used when a props.HasProps class needs a vector property. PROPS.VECTOR is a props.Array with different default values. Overriding these defaults is allowed but not recommended; just use props.Array instead. PROPS.VECTOR also allows the values ‘X’, ‘Y’, and ‘Z’; these are converted to [1 0 0], [0 1 0], and [0 0 1], respectively.
Attributes - No properties besides those inherited from props.Array
Example:
...
class HasVectorProp < props.HasProps
    properties (Hidden, SetAccess = immutable)
        VectorPropStruct = {                                    ...
            struct(                                             ...
                'Name', 'ViewDirection',                        ...
                'Type', @props.Vector,                          ...
                'Doc', 'Three-component view direction vector', ...
                'DefaultValue', 'Z'                             ...
            )                                                   ...
        }
    end
    ...
end
See also props.Prop, props.HasProps, props.Array, props.Float
installSteno3D
-
installSteno3D(...)
Add Steno3D to the MATLAB environment
installSteno3D() copies steno3dmat to ‘~/.steno3d_client/’ and adds
steno3d to the default MATLAB path.
installSteno3D(folder) copies steno3dmat to folder and adds steno3d to
the default MATLAB path.
Note
Steno3D requires MATLAB R2014b or later
% To install Steno3D to the standard toolbox location
installSteno3D([matlabroot filesep 'toolbox'])
See also upgradeSteno3D, uninstallSteno3D, testSteno3D
upgradeSteno3D
-
upgradeSteno3D(...)
Download and install the latest version of Steno3D
upgradeSteno3D() checks for an existing Steno3D installation, downloads
the latest release of Steno3D to a temporary directory, tests the new
version of Steno3D, and if tests pass, replaces the old version.
On login, Steno3D checks if the current version is out of date. If so,
the user will be prompted to upgradeSteno3D()
See also steno3d.login, uninstallSteno3D, installSteno3D, testSteno3D
uninstallSteno3D
-
uninstallSteno3D(...)
Remove Steno3D from the MATLAB environment
uninstallSteno3D() removes steno3d from the MATLAB path and prompts the
user to delete the directory with Steno3D files.
Note
This function deletes the entire steno3dmat directory if the user answers yes to a prompt. This will delete any files in that directory even if they were not part of the original installation.
See also upgradeSteno3D, installSteno3D
testSteno3D
-
testSteno3D(...)
Test suite for steno3d
success = testSteno3D() returns true if all tests pass and false if
they fail.
success = testSteno3D(true) raises an error instead of returning
false if tests fail.
See also installSteno3D, upgradeSteno3D